Shelly Devices
Shelly devices have gained a lot in popularity since I first put this page up in early 2021. Good for them, as they are more open and give you greater use case flexibility than many of the big name smart home device makers.
Common Use Cases
- Install a relay switch behind a standard “non-smart” light switch …to make it smart
- Install a relay switch behind standard wall outlet to monitor energy usage and/or toggle state
- Embed inside a device (for example a fan or a space heater)
- Extreme caution is warranted on this last example
Other Use Cases
- Keep track of an appliance state, like a dishwasher, by tracking the changes to its power usage
- Certain devices, like a Keurig or a kettle, consume power at a specific wattage when turned on. These power spikes can be used to uniquely identify a device and that can be used to “count” things, like the number of coffee pods used each day.
Some of the devices I use:
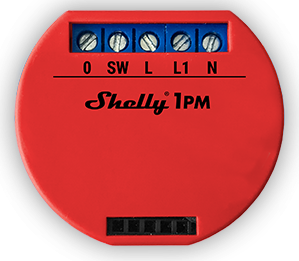
- Shelly 1PM Gen1 - wifi relay switch with energy monitoring
- Product Info: https://kb.shelly.cloud/knowledge-base/shelly-1pm
- Wiring Diagram: https://kb.shelly.cloud/knowledge-base/shelly-plus-1pm#wiring
- NOTE: Gen3 devices are now available
- Shelly 1PM Mini Gen3 Wifi & Bluetooth
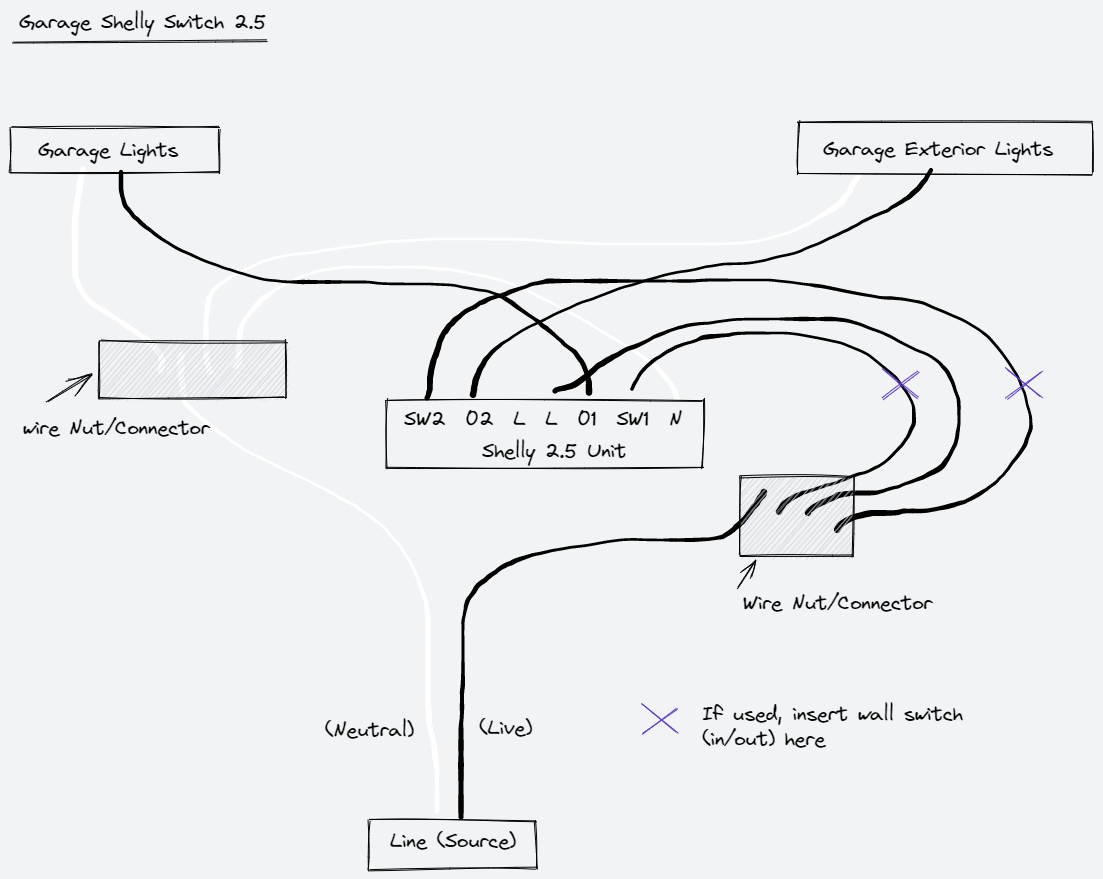
- Shelly 2.5 - wifi double relay switch with energy monitoring
- Product info: https://www.shelly.com/en-us/products/shop/shelly-plus-2-pm
- My wiring diagram
- Shelly BLU Motion - small, responsive, bluetooth motion sensor
Setup & Config Tips:
NOTE: The comment below regarding Shelly’s iOS was written in early 2021. Likely it has much improved since then, but I purchased these devices to integrate into Home Assistant, so there hasn’t been much reason to try it again…
- Don’t use the mobile app to setup the device. You don’t need it, and in my experience (on iOS) it causes problems.
- When attached to power, the device will broadcast itself as a web server
- To connect to the device and add it to your local WIFI:
- Attach to the web server’s SSID: format will be “Shelly1pm-xxxxxx”
- Enter 192.168.33.1 in any web browser to bring up the device’s main page
- Visit “Internet & Security” and select the WIFI Mode-CLIENT
- Enter your local SSID & pwd
- If you use static IP addresses assign that on your router
- After connecting the device to your local wifi, enable cloud access to automatically detect and receive firmware updates
- If you do not want cloud access disable it again once the firmware has been updated
- If you do not want cloud access disable it again once the firmware has been updated
Wiring Reference:
NOTE - Disclaimer: proper use of these devices requires a clear understanding of electrical wiring systems in your area. This includes: voltages, amps, coloring schemes, line vs. load, etc. Getting these thing wrong may result in fire. Rule of thumb: if something doesn’t make sense or you don’t understand, hire someone.
Here’s an example of what turned out to be a product defect, but it underscores the potential danger of an incorrect installation. Make sure you buy products from known companies and that the device is UL listed
Shelly 1PM - installation pics
This is the original wiring before any modifications
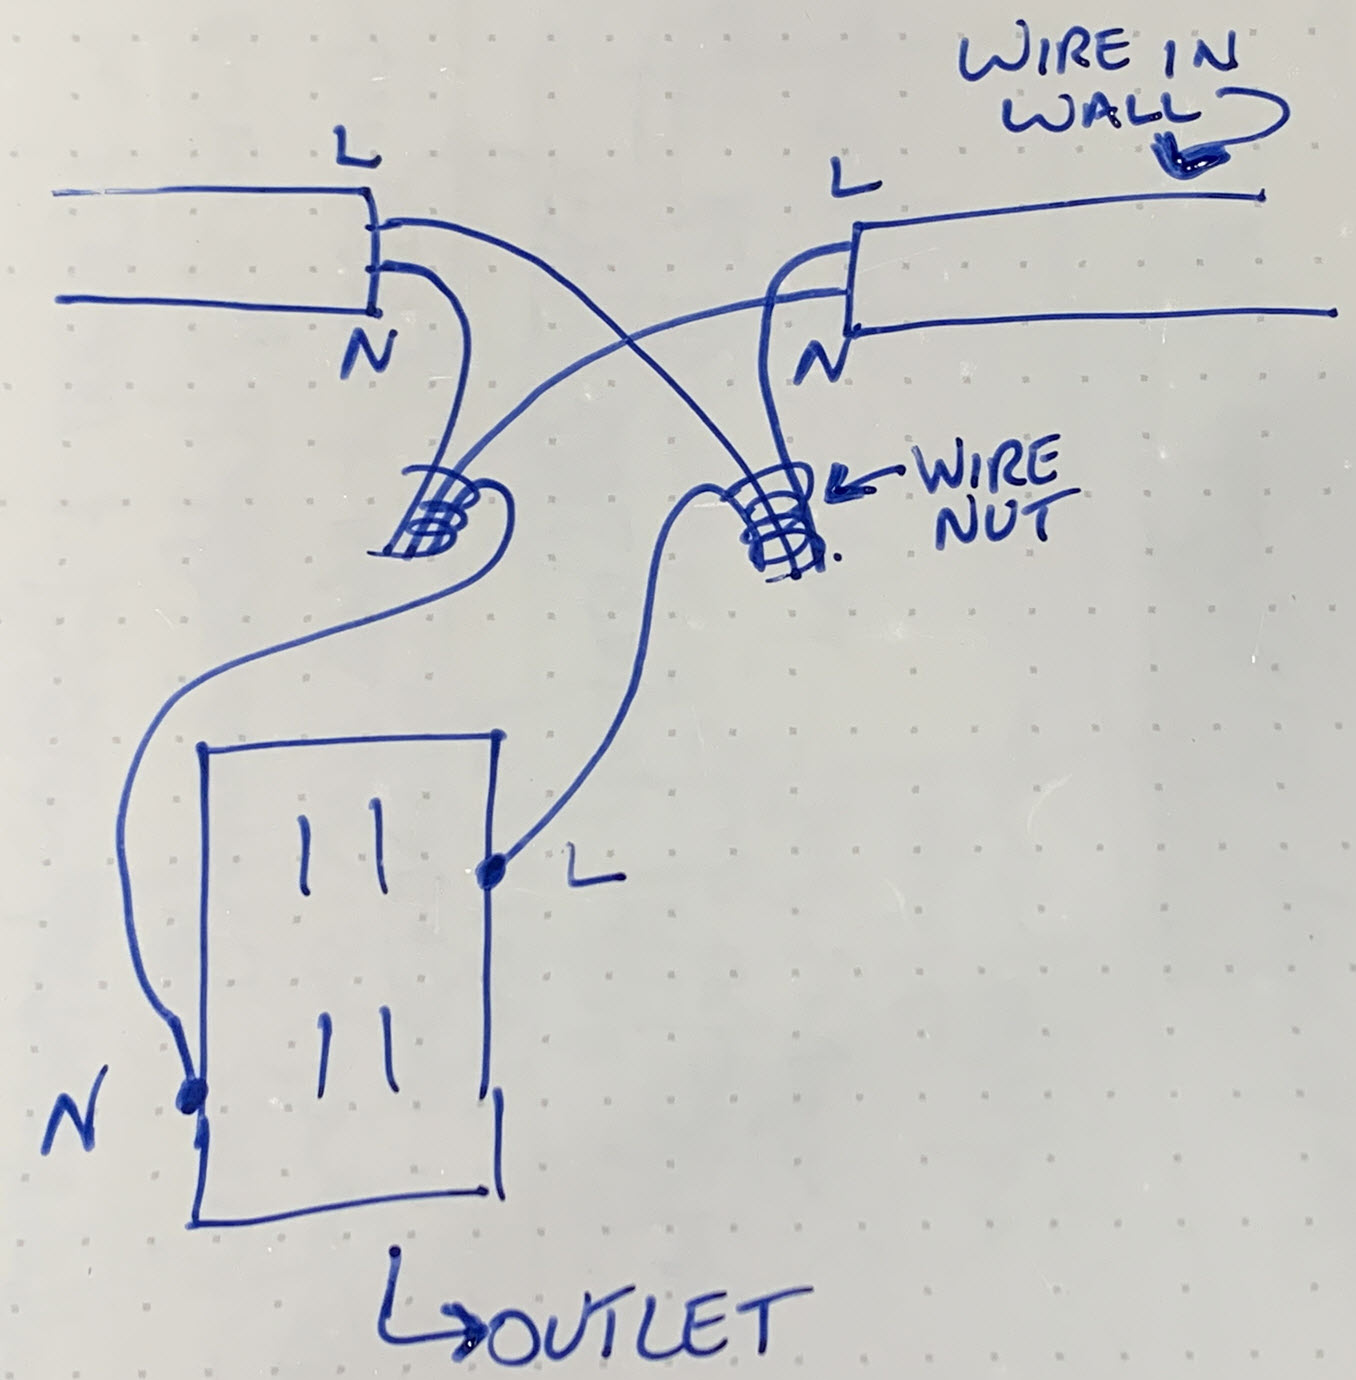
Diagram of connected wiring inside the box ...note: didn't draw the ground wire...
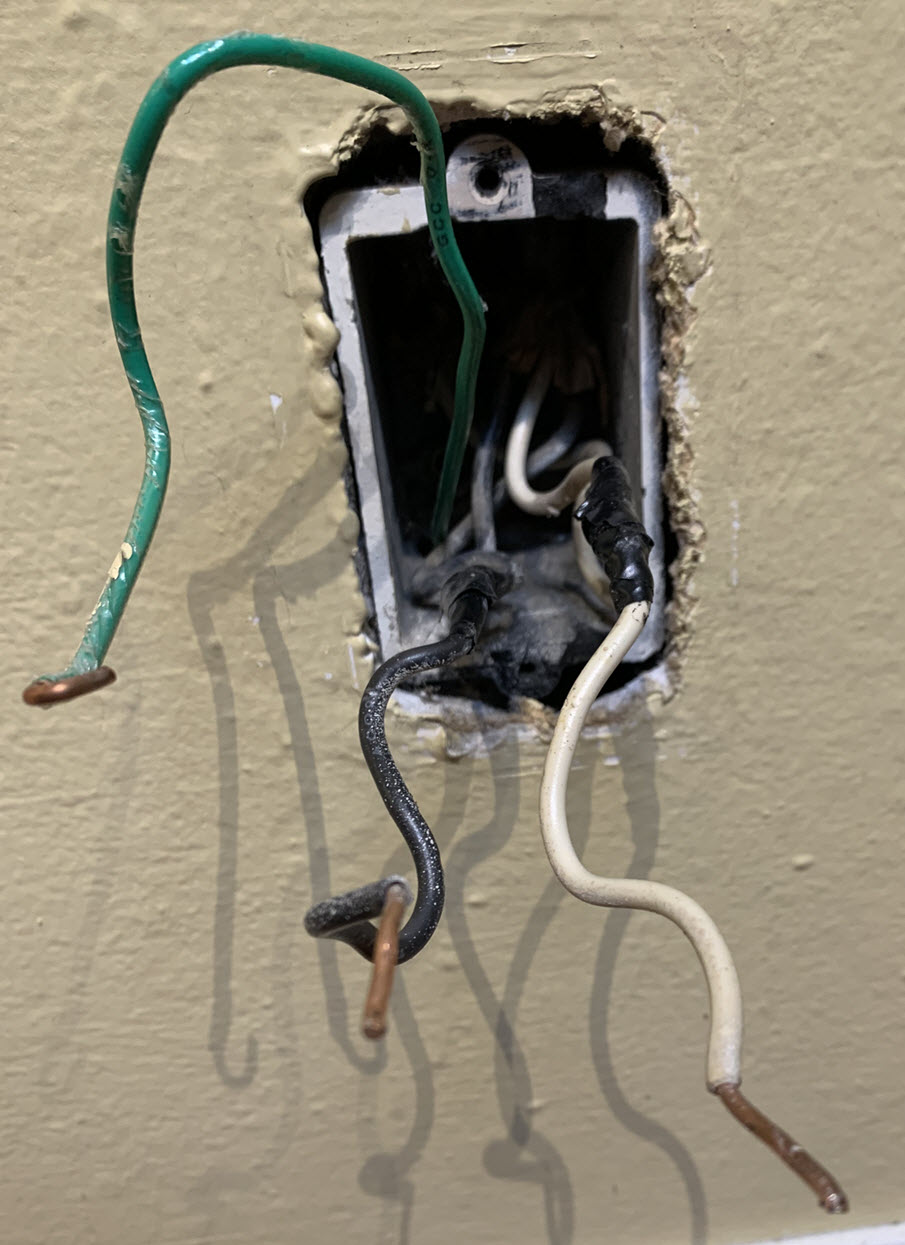
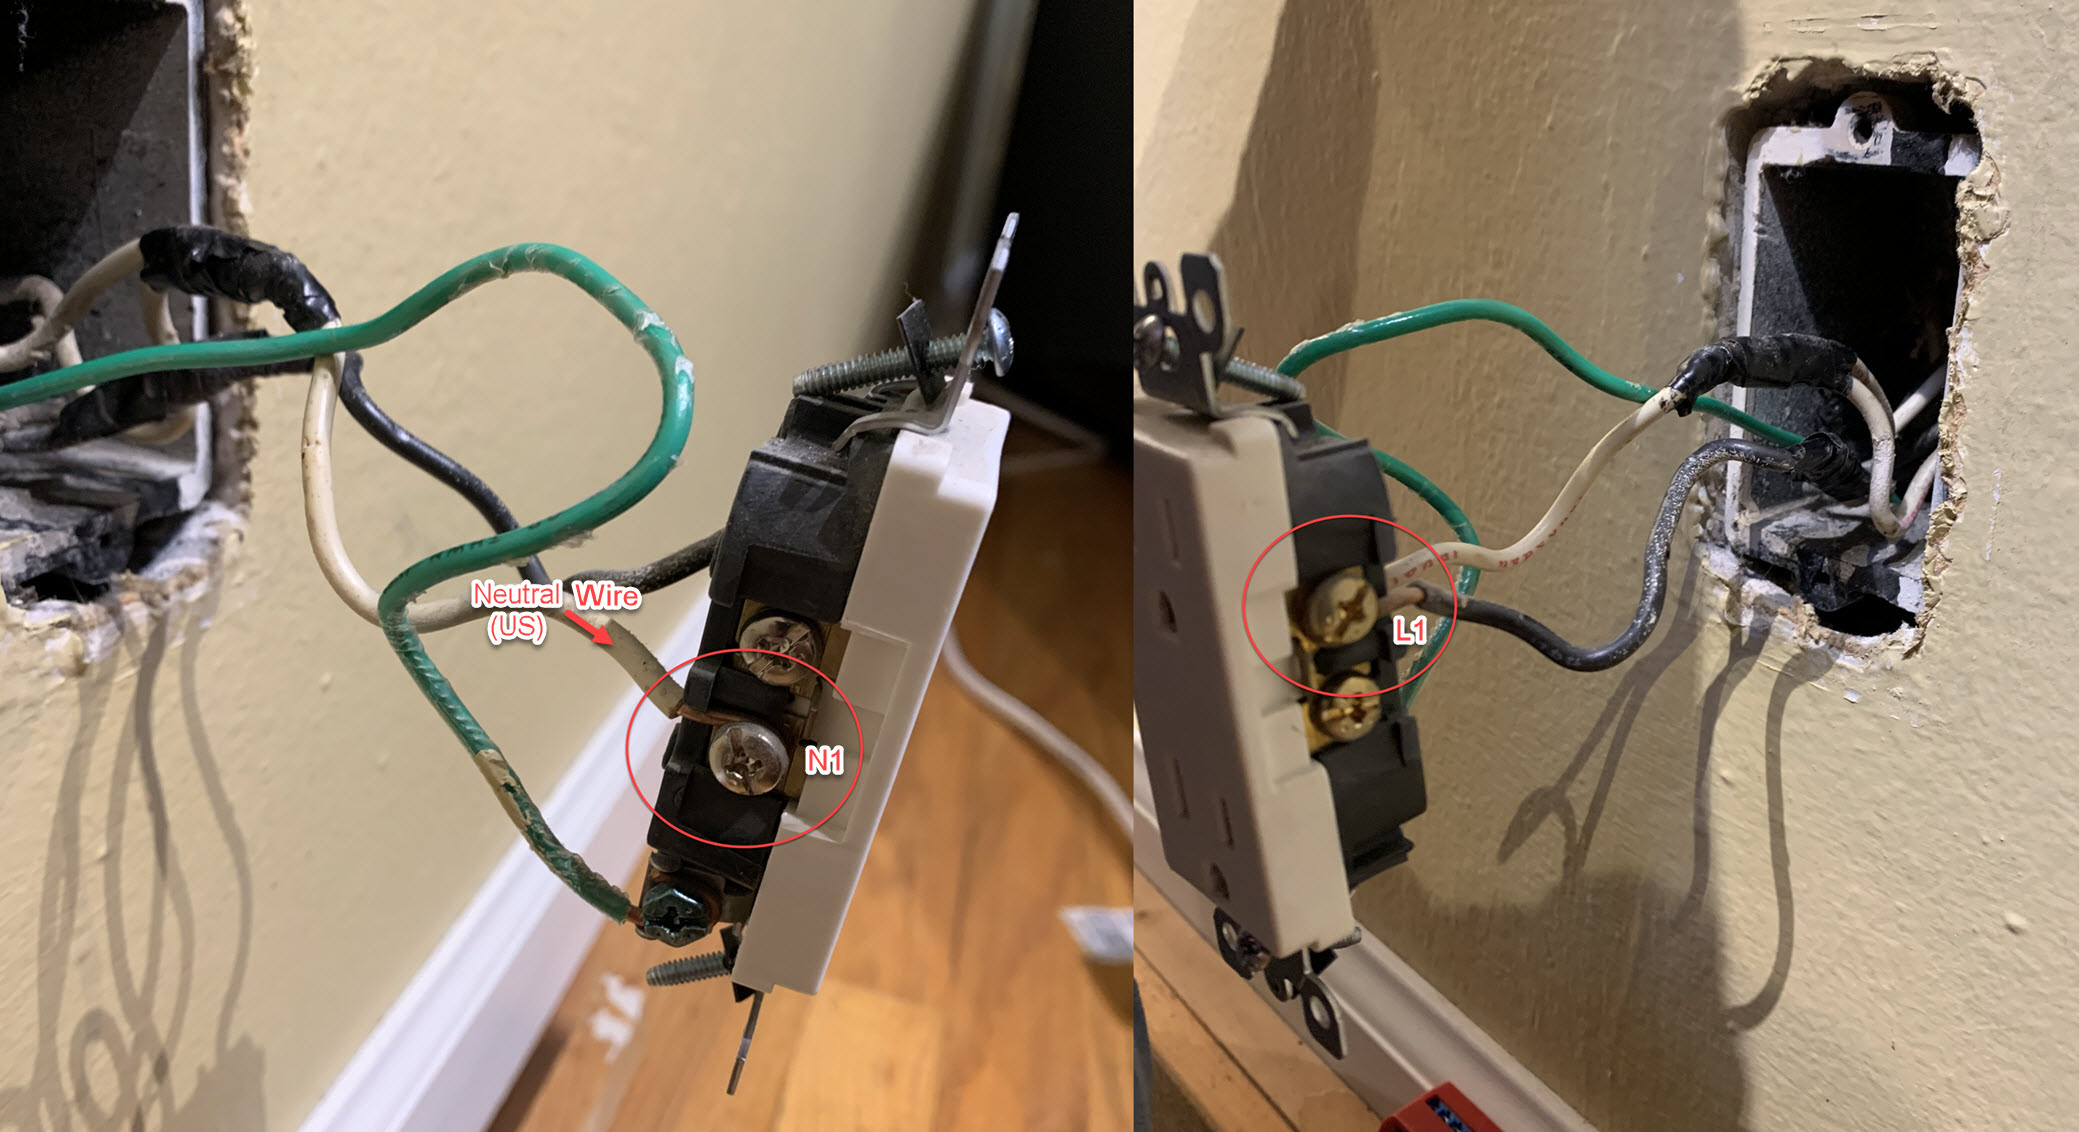
Bare wires - black=hot, white=neutral, green=ground
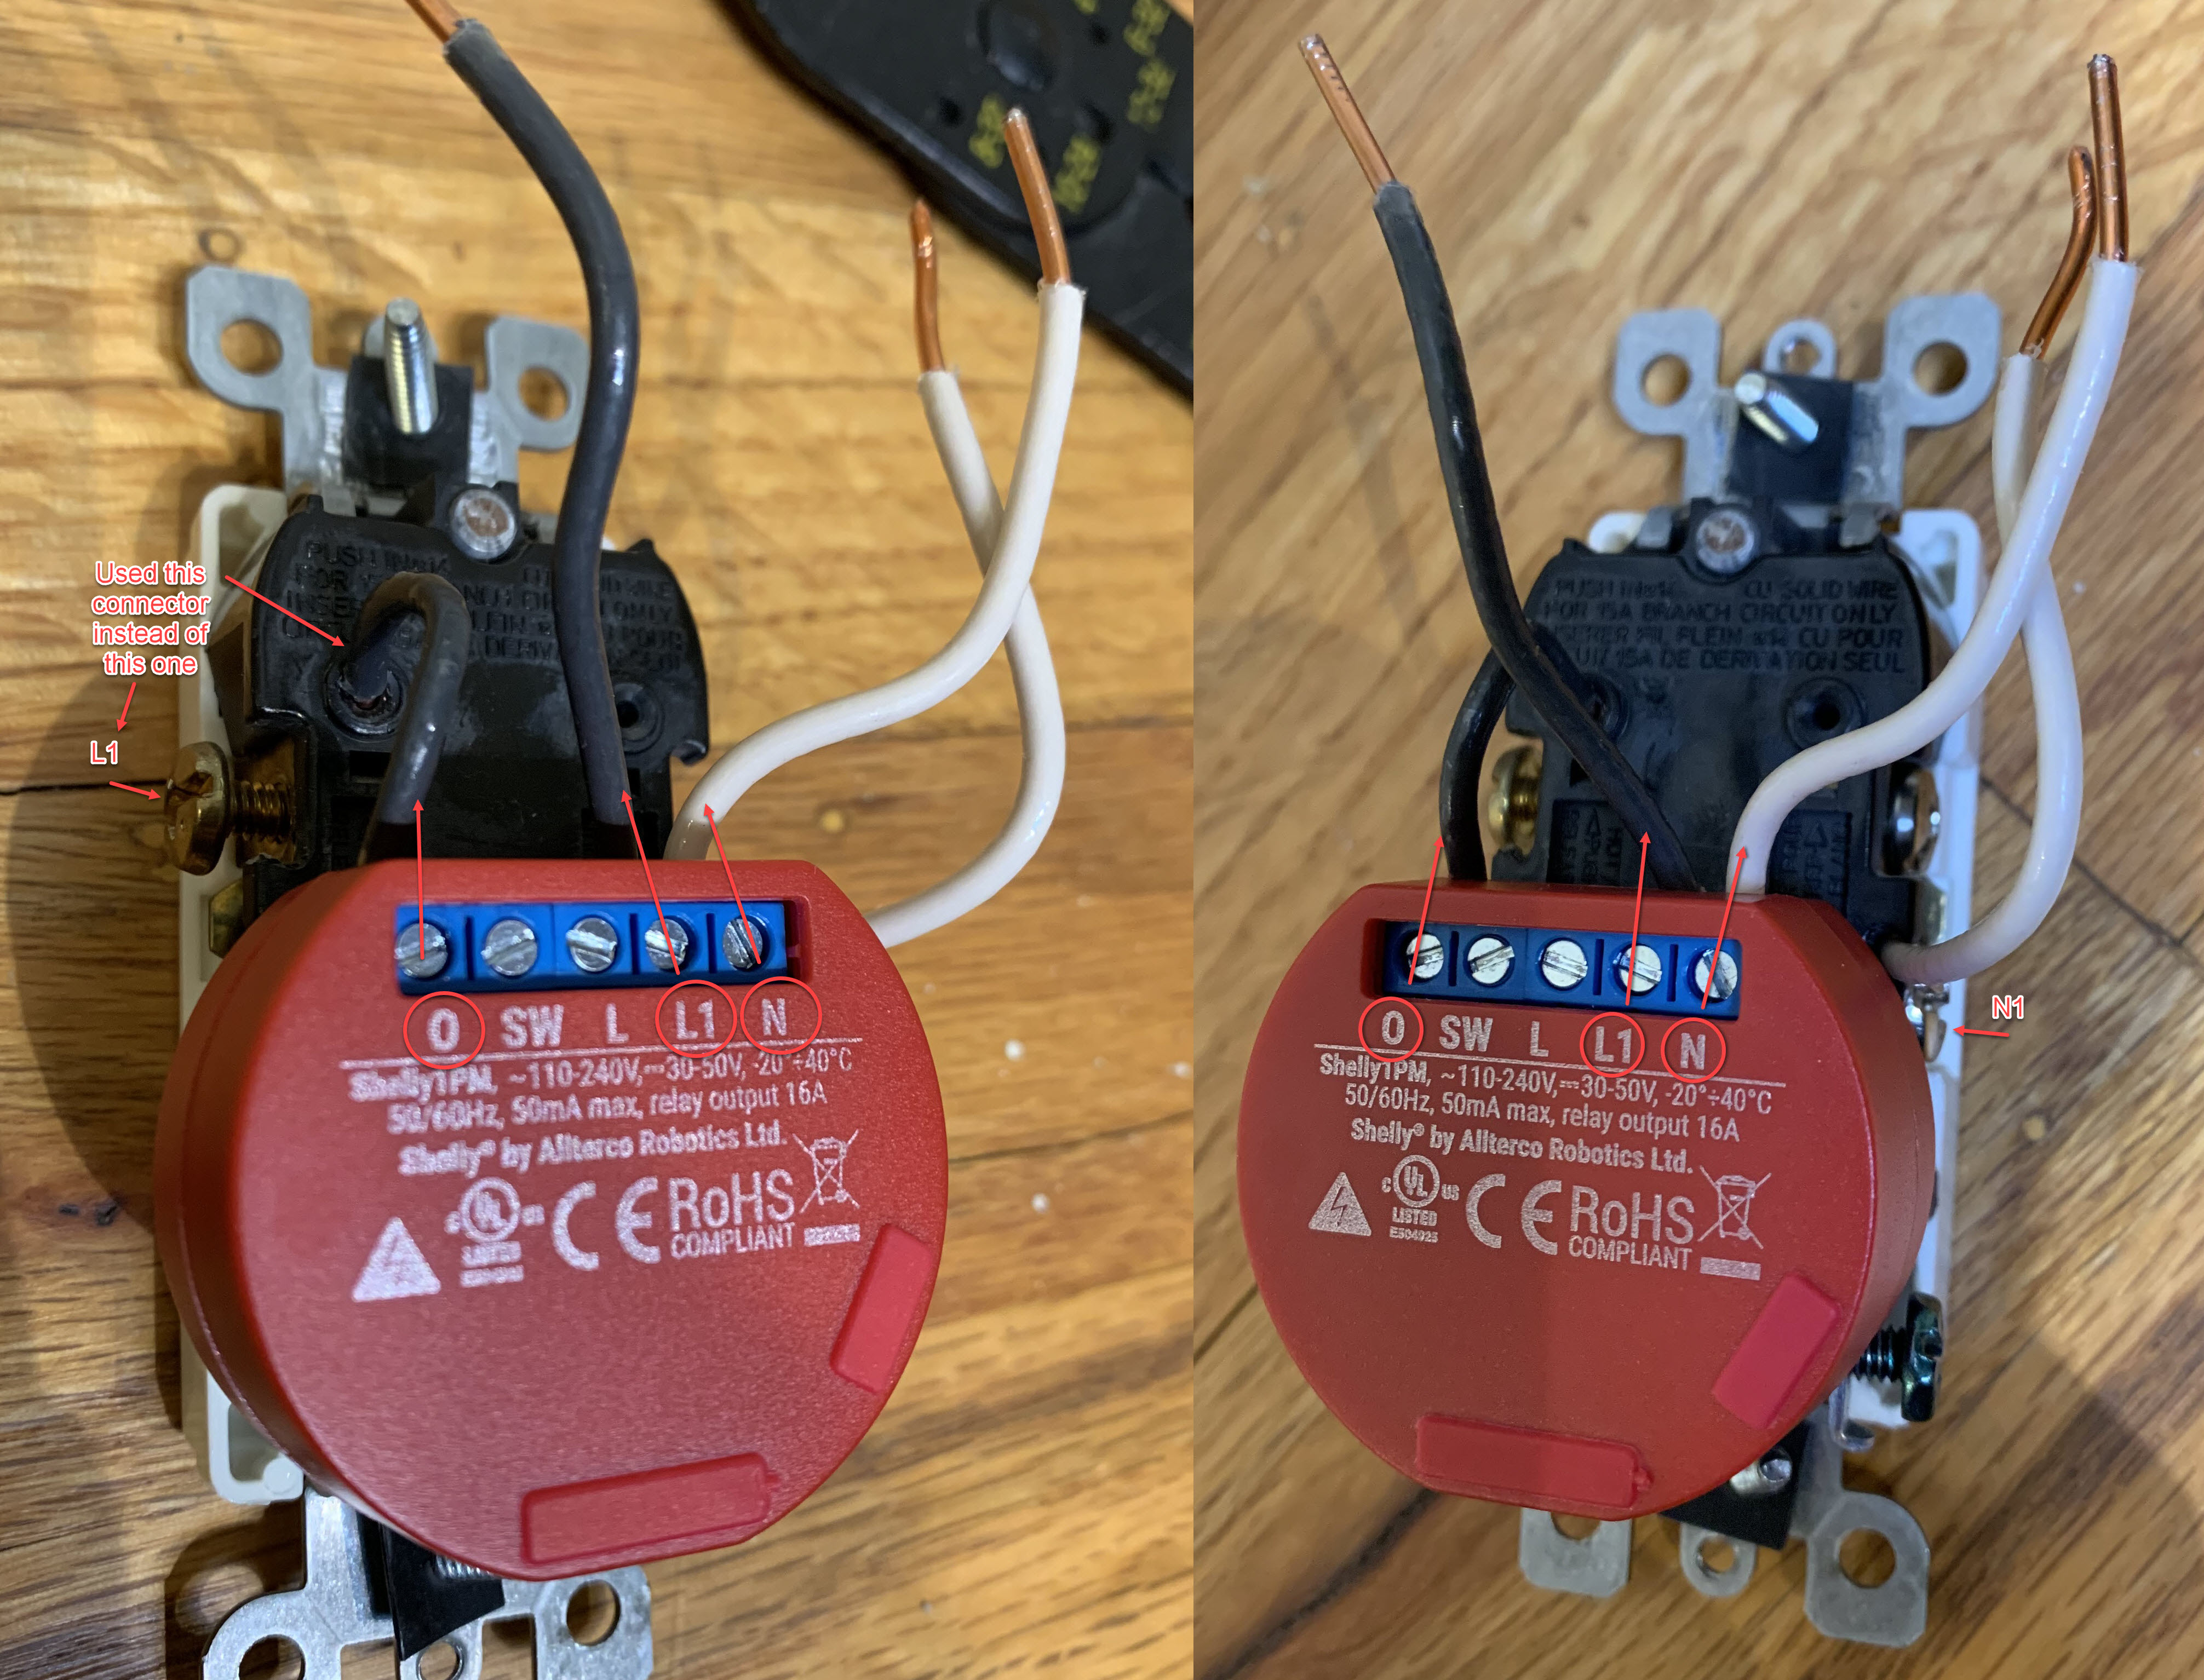
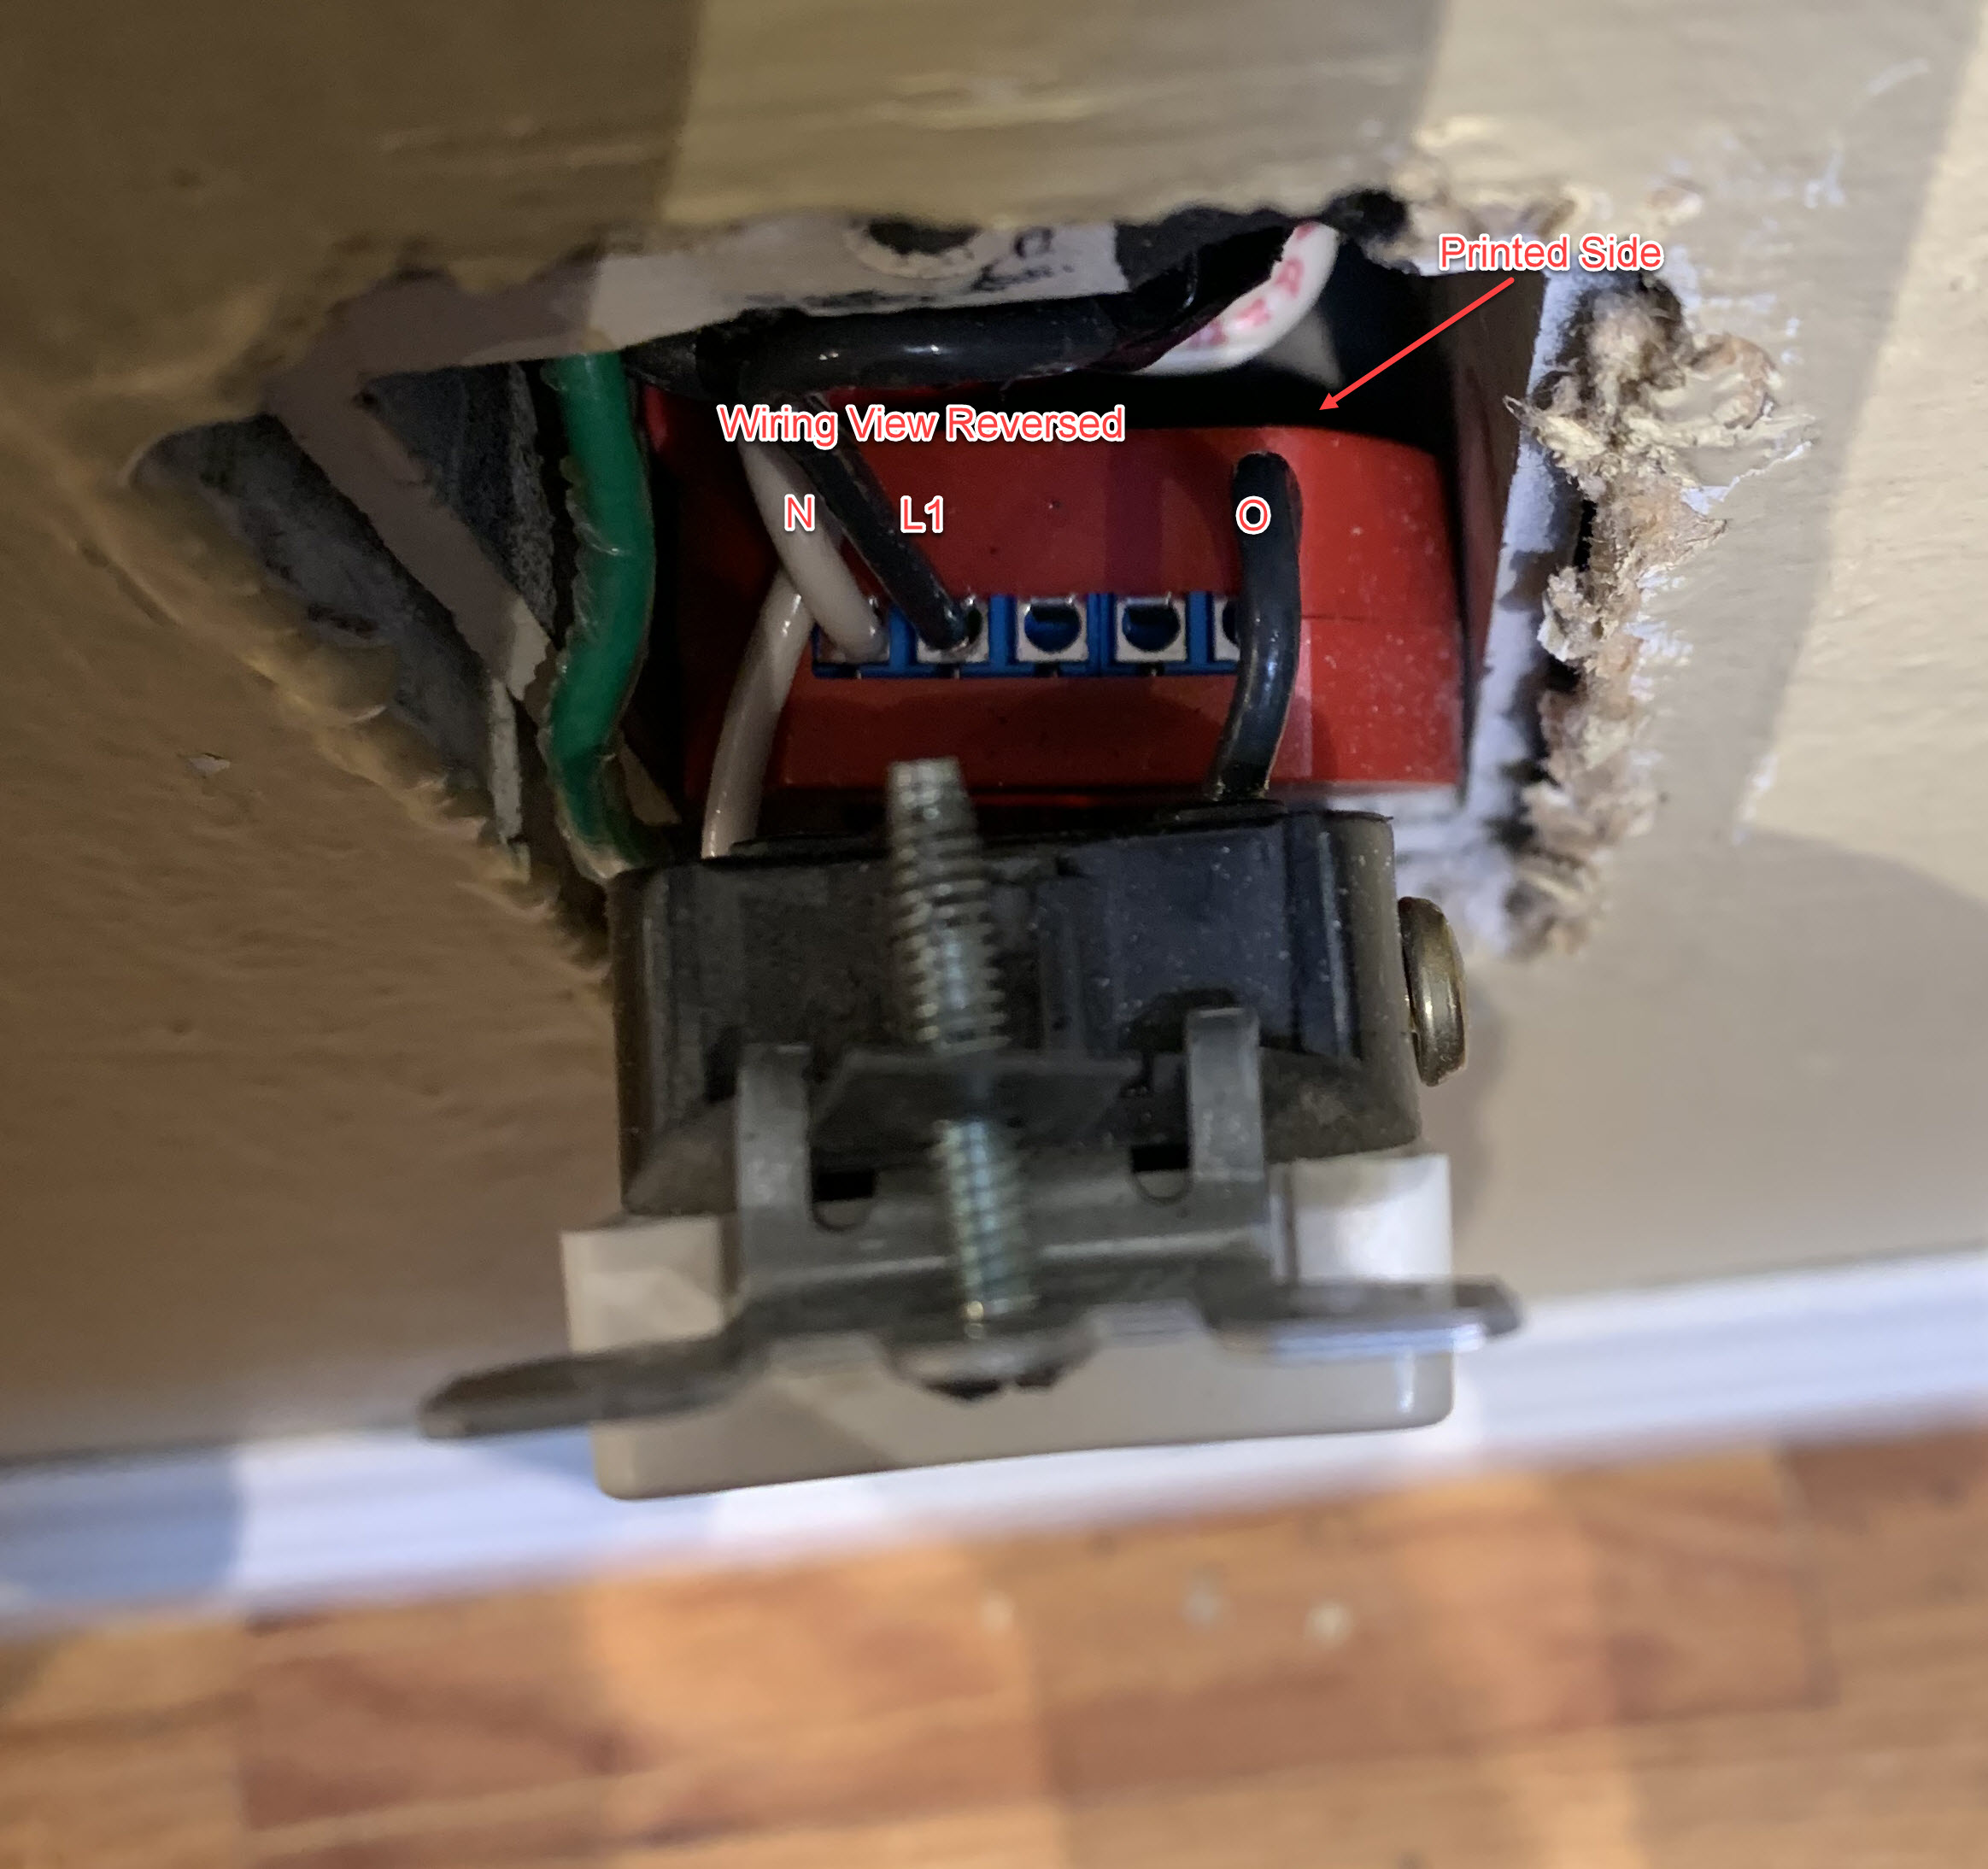
Wiring Shelly 1PM to back of outlet
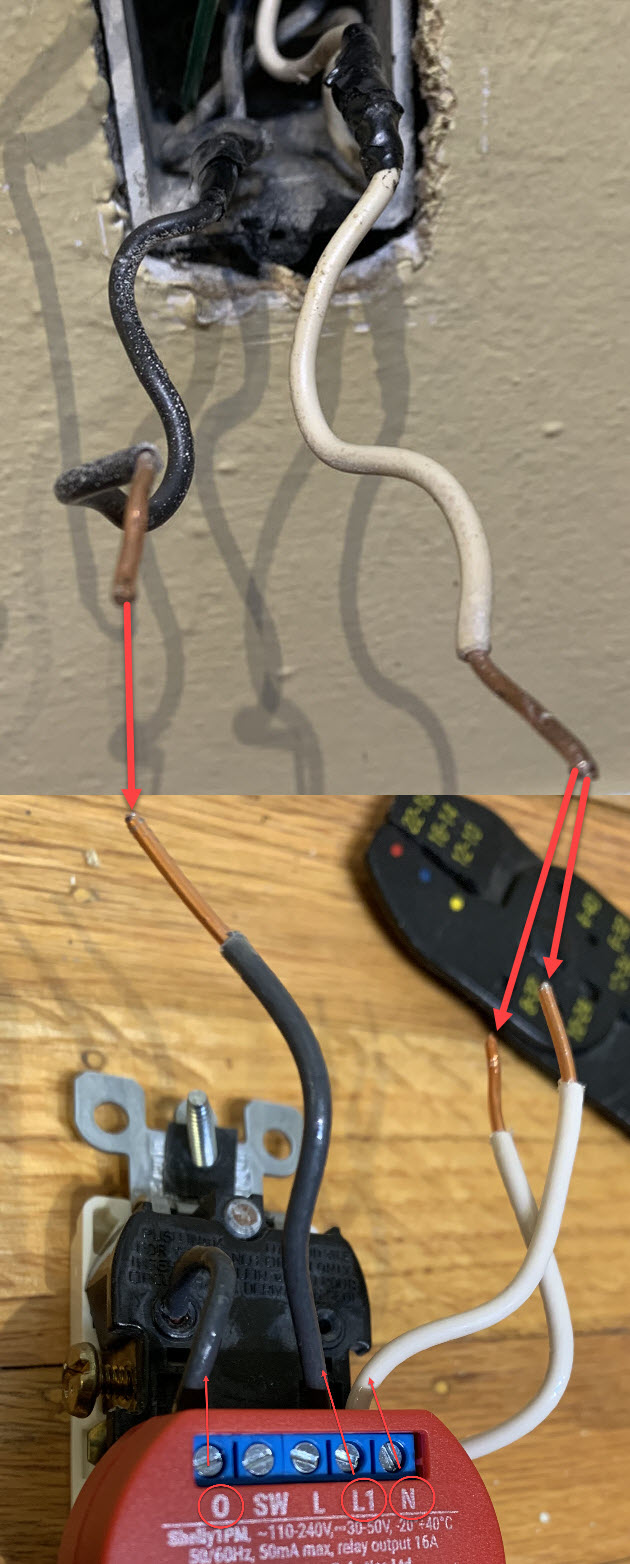
Missed taking a pic of connecting the wires, so this composite image will have to suffice
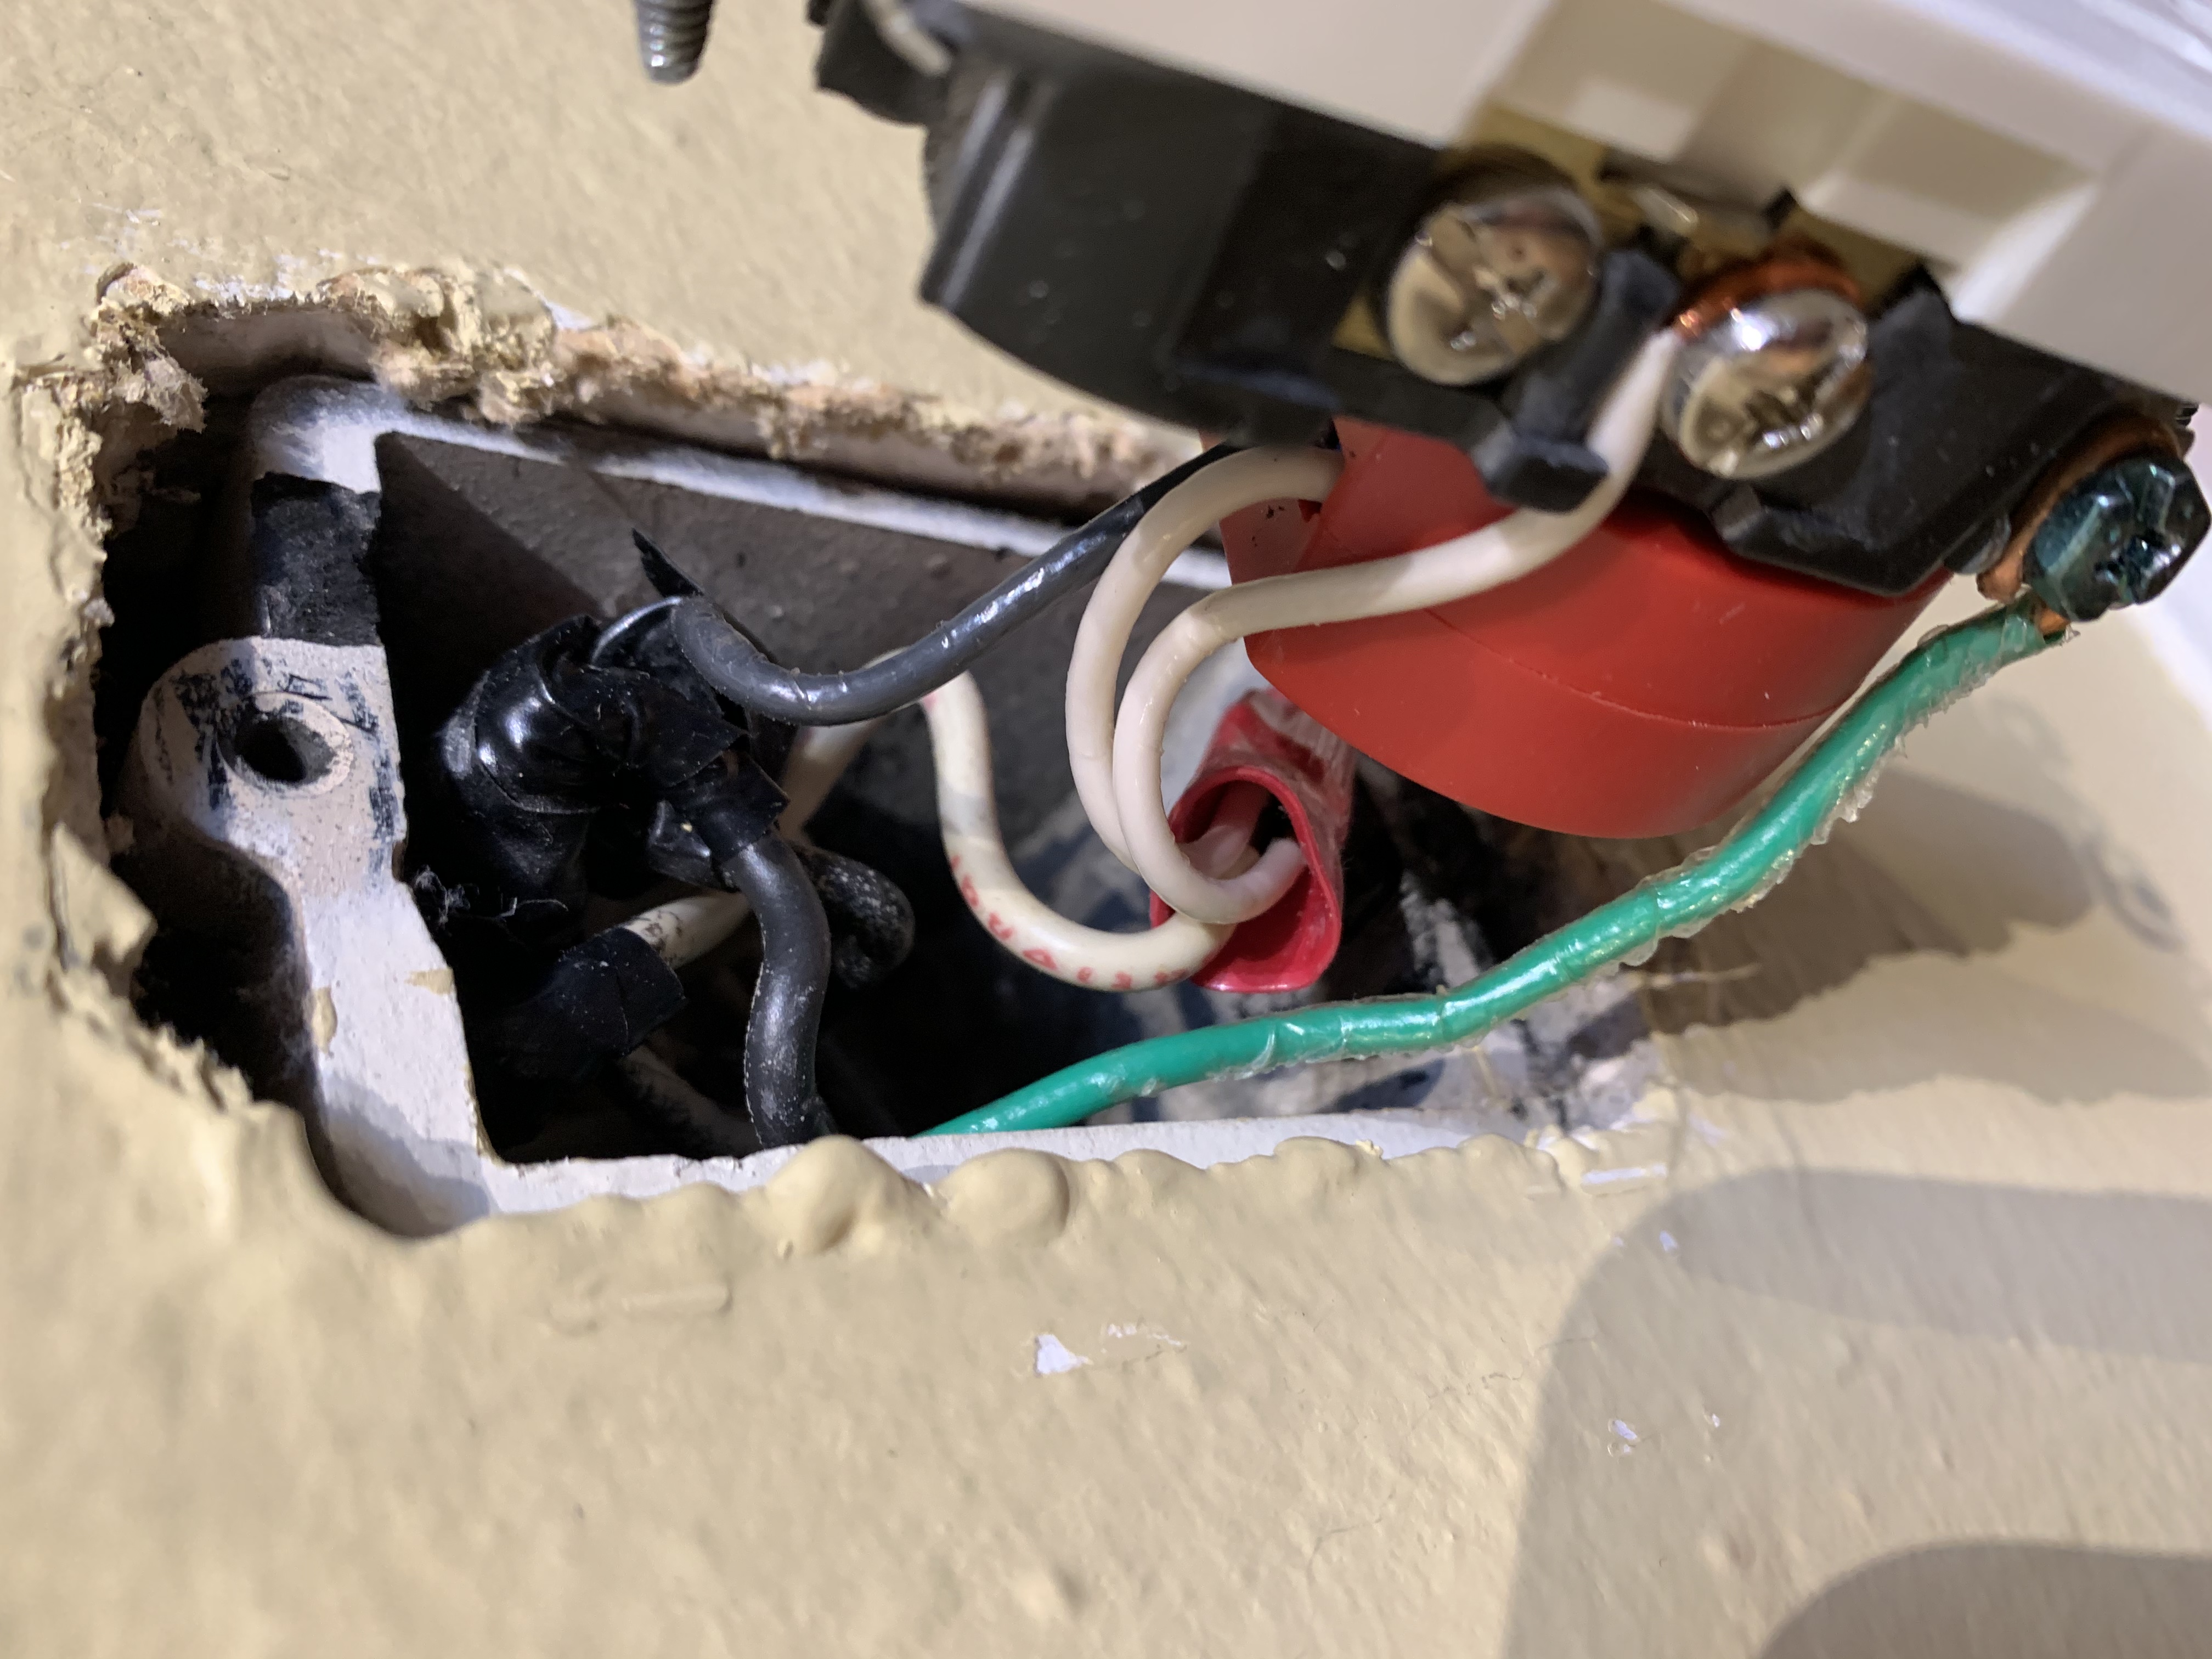
All wired up, side view before insert outlet back into the wall
Top view of device and outlet being inserted into wall
