Hiding Network Gear
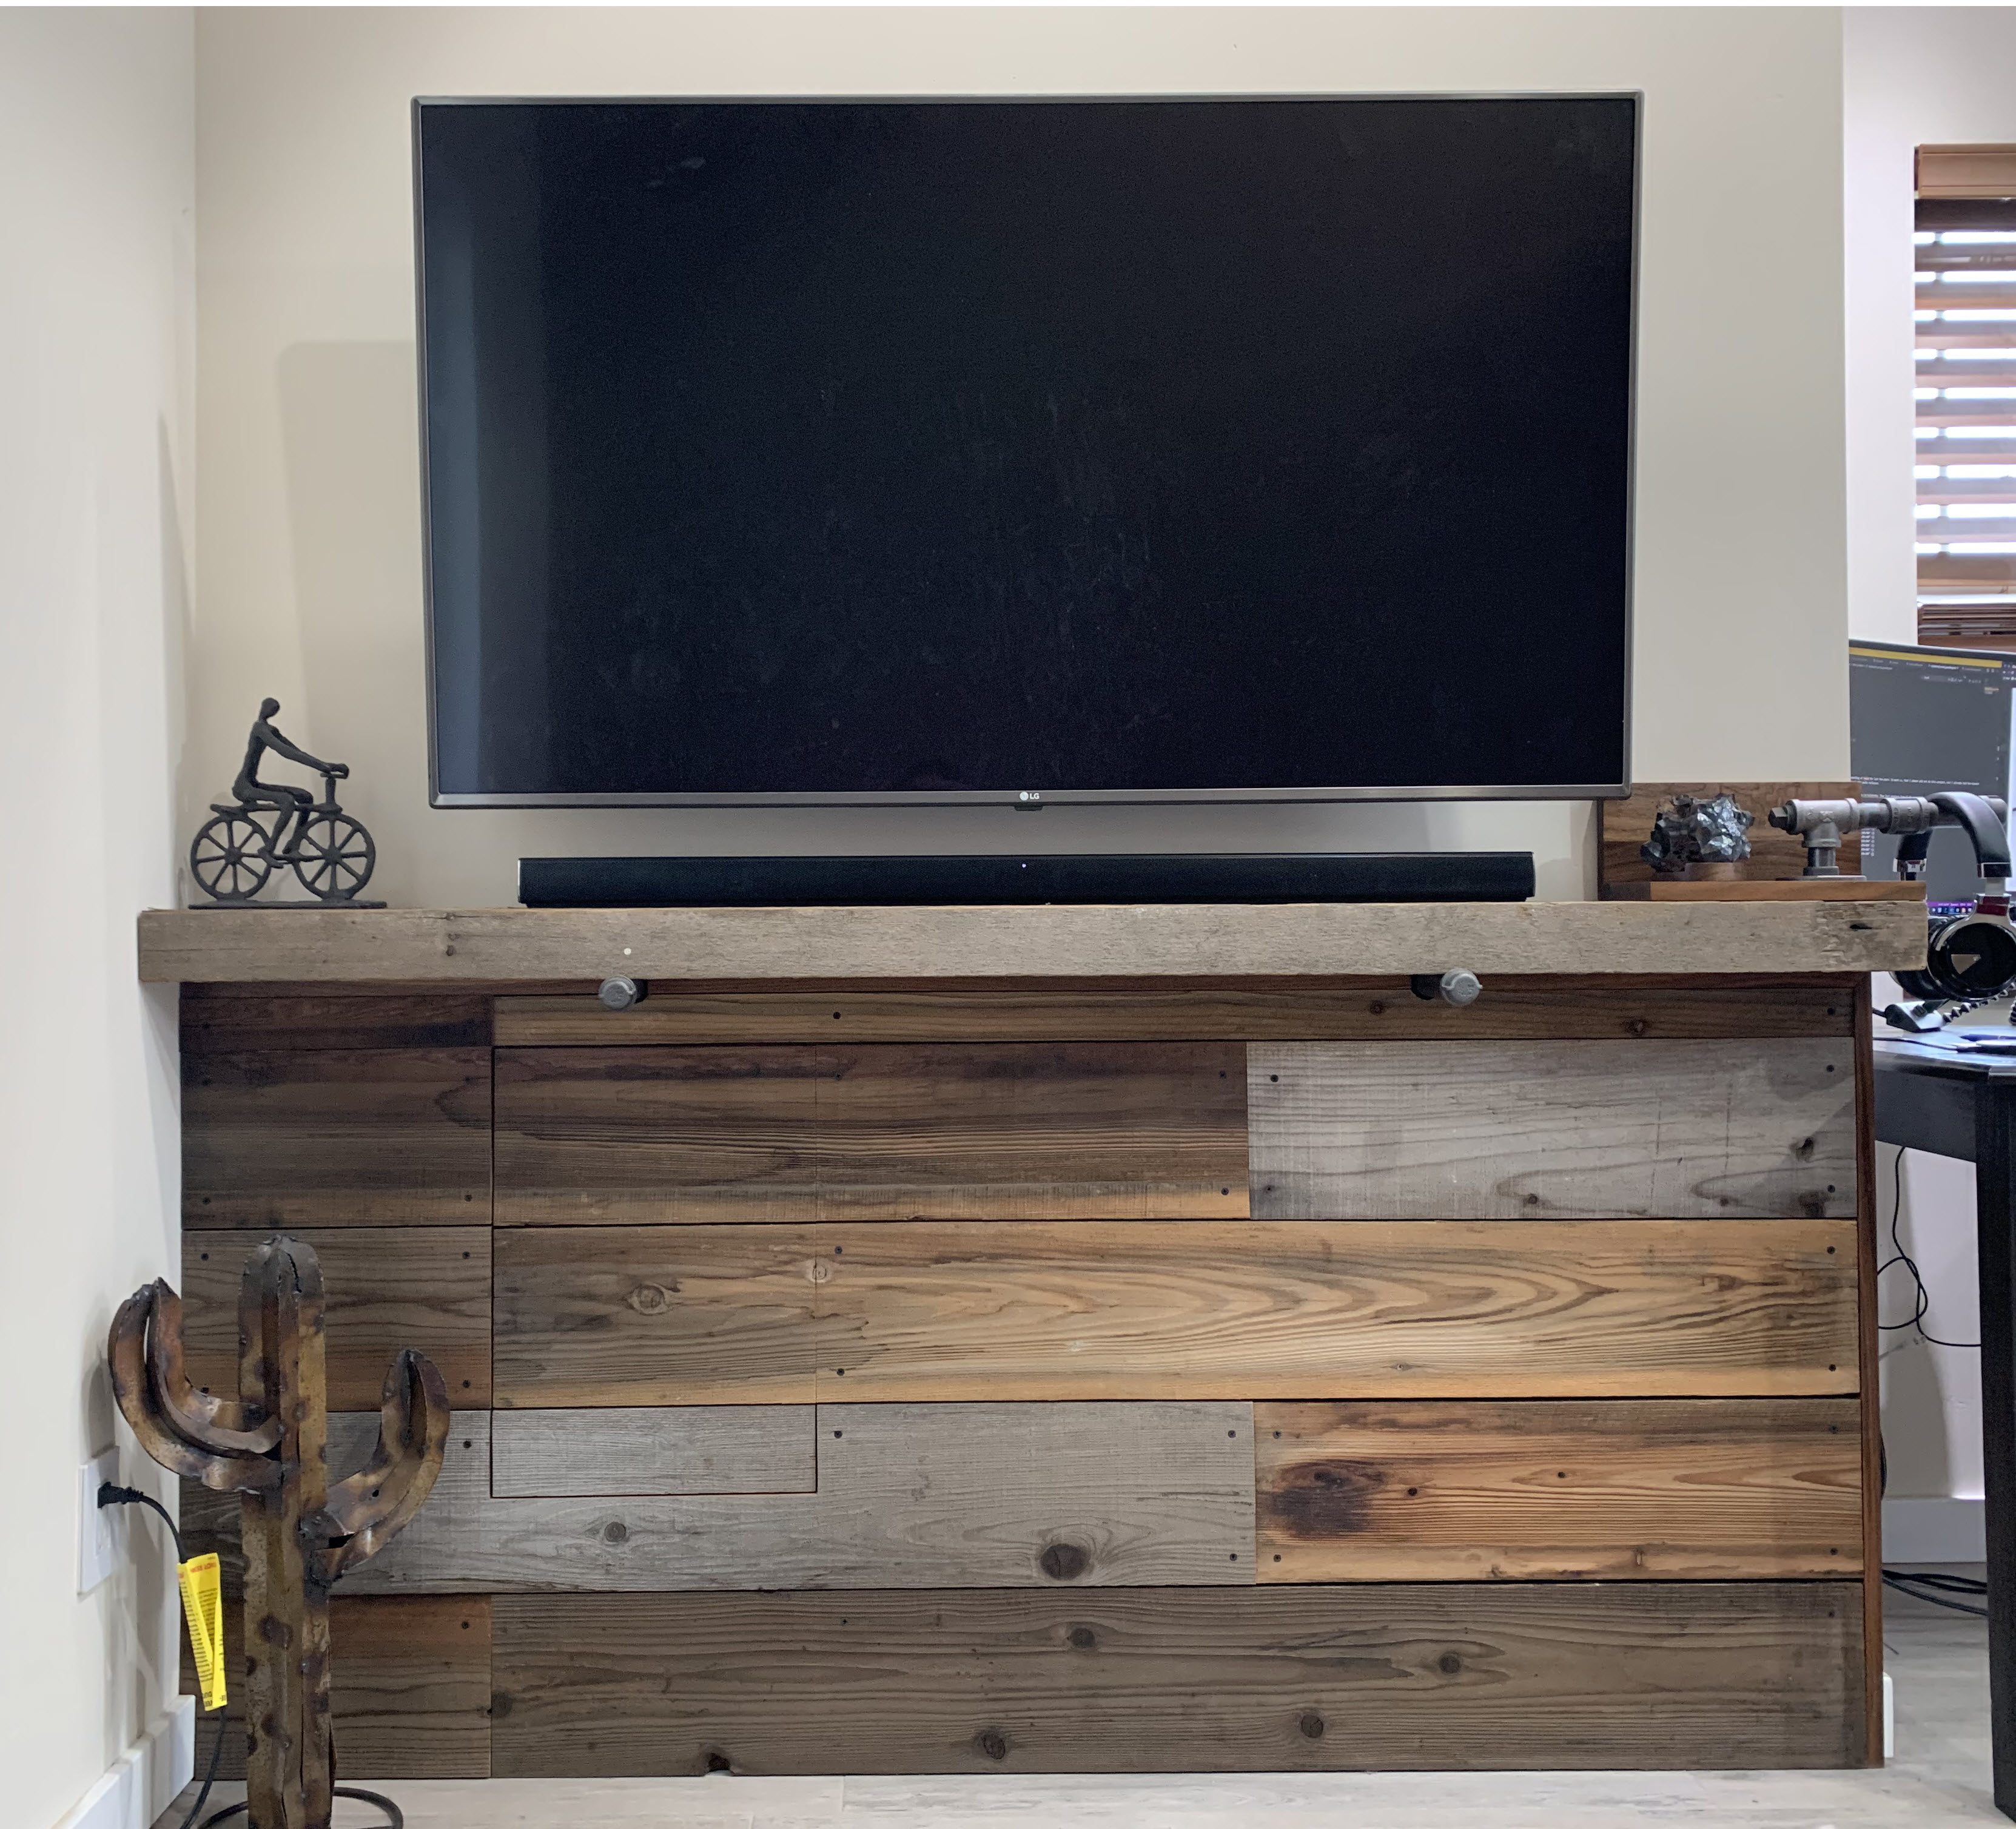
I installed Cat6 Ethernet in my home office while it was being built. I ran six lines underground from the house into the office, and twelve more were routed around the office to support various devices. All eighteen cables terminated inside an in-wall media enclosure box. This setup worked well for connecting everything through patch panels and related networking gear, but unfortunately, the enclosure had to be placed in a location that made it difficult to hide. Simply using the metal cover these boxes typically come with wasn’t ideal for my use case, so I needed to find another way to conceal the gear and reduce its visual impact. As shown in the picture above, my solution was to hide the box behind recycled fence boards, cut out a panel for access, and cap the panels with a wooden ledge
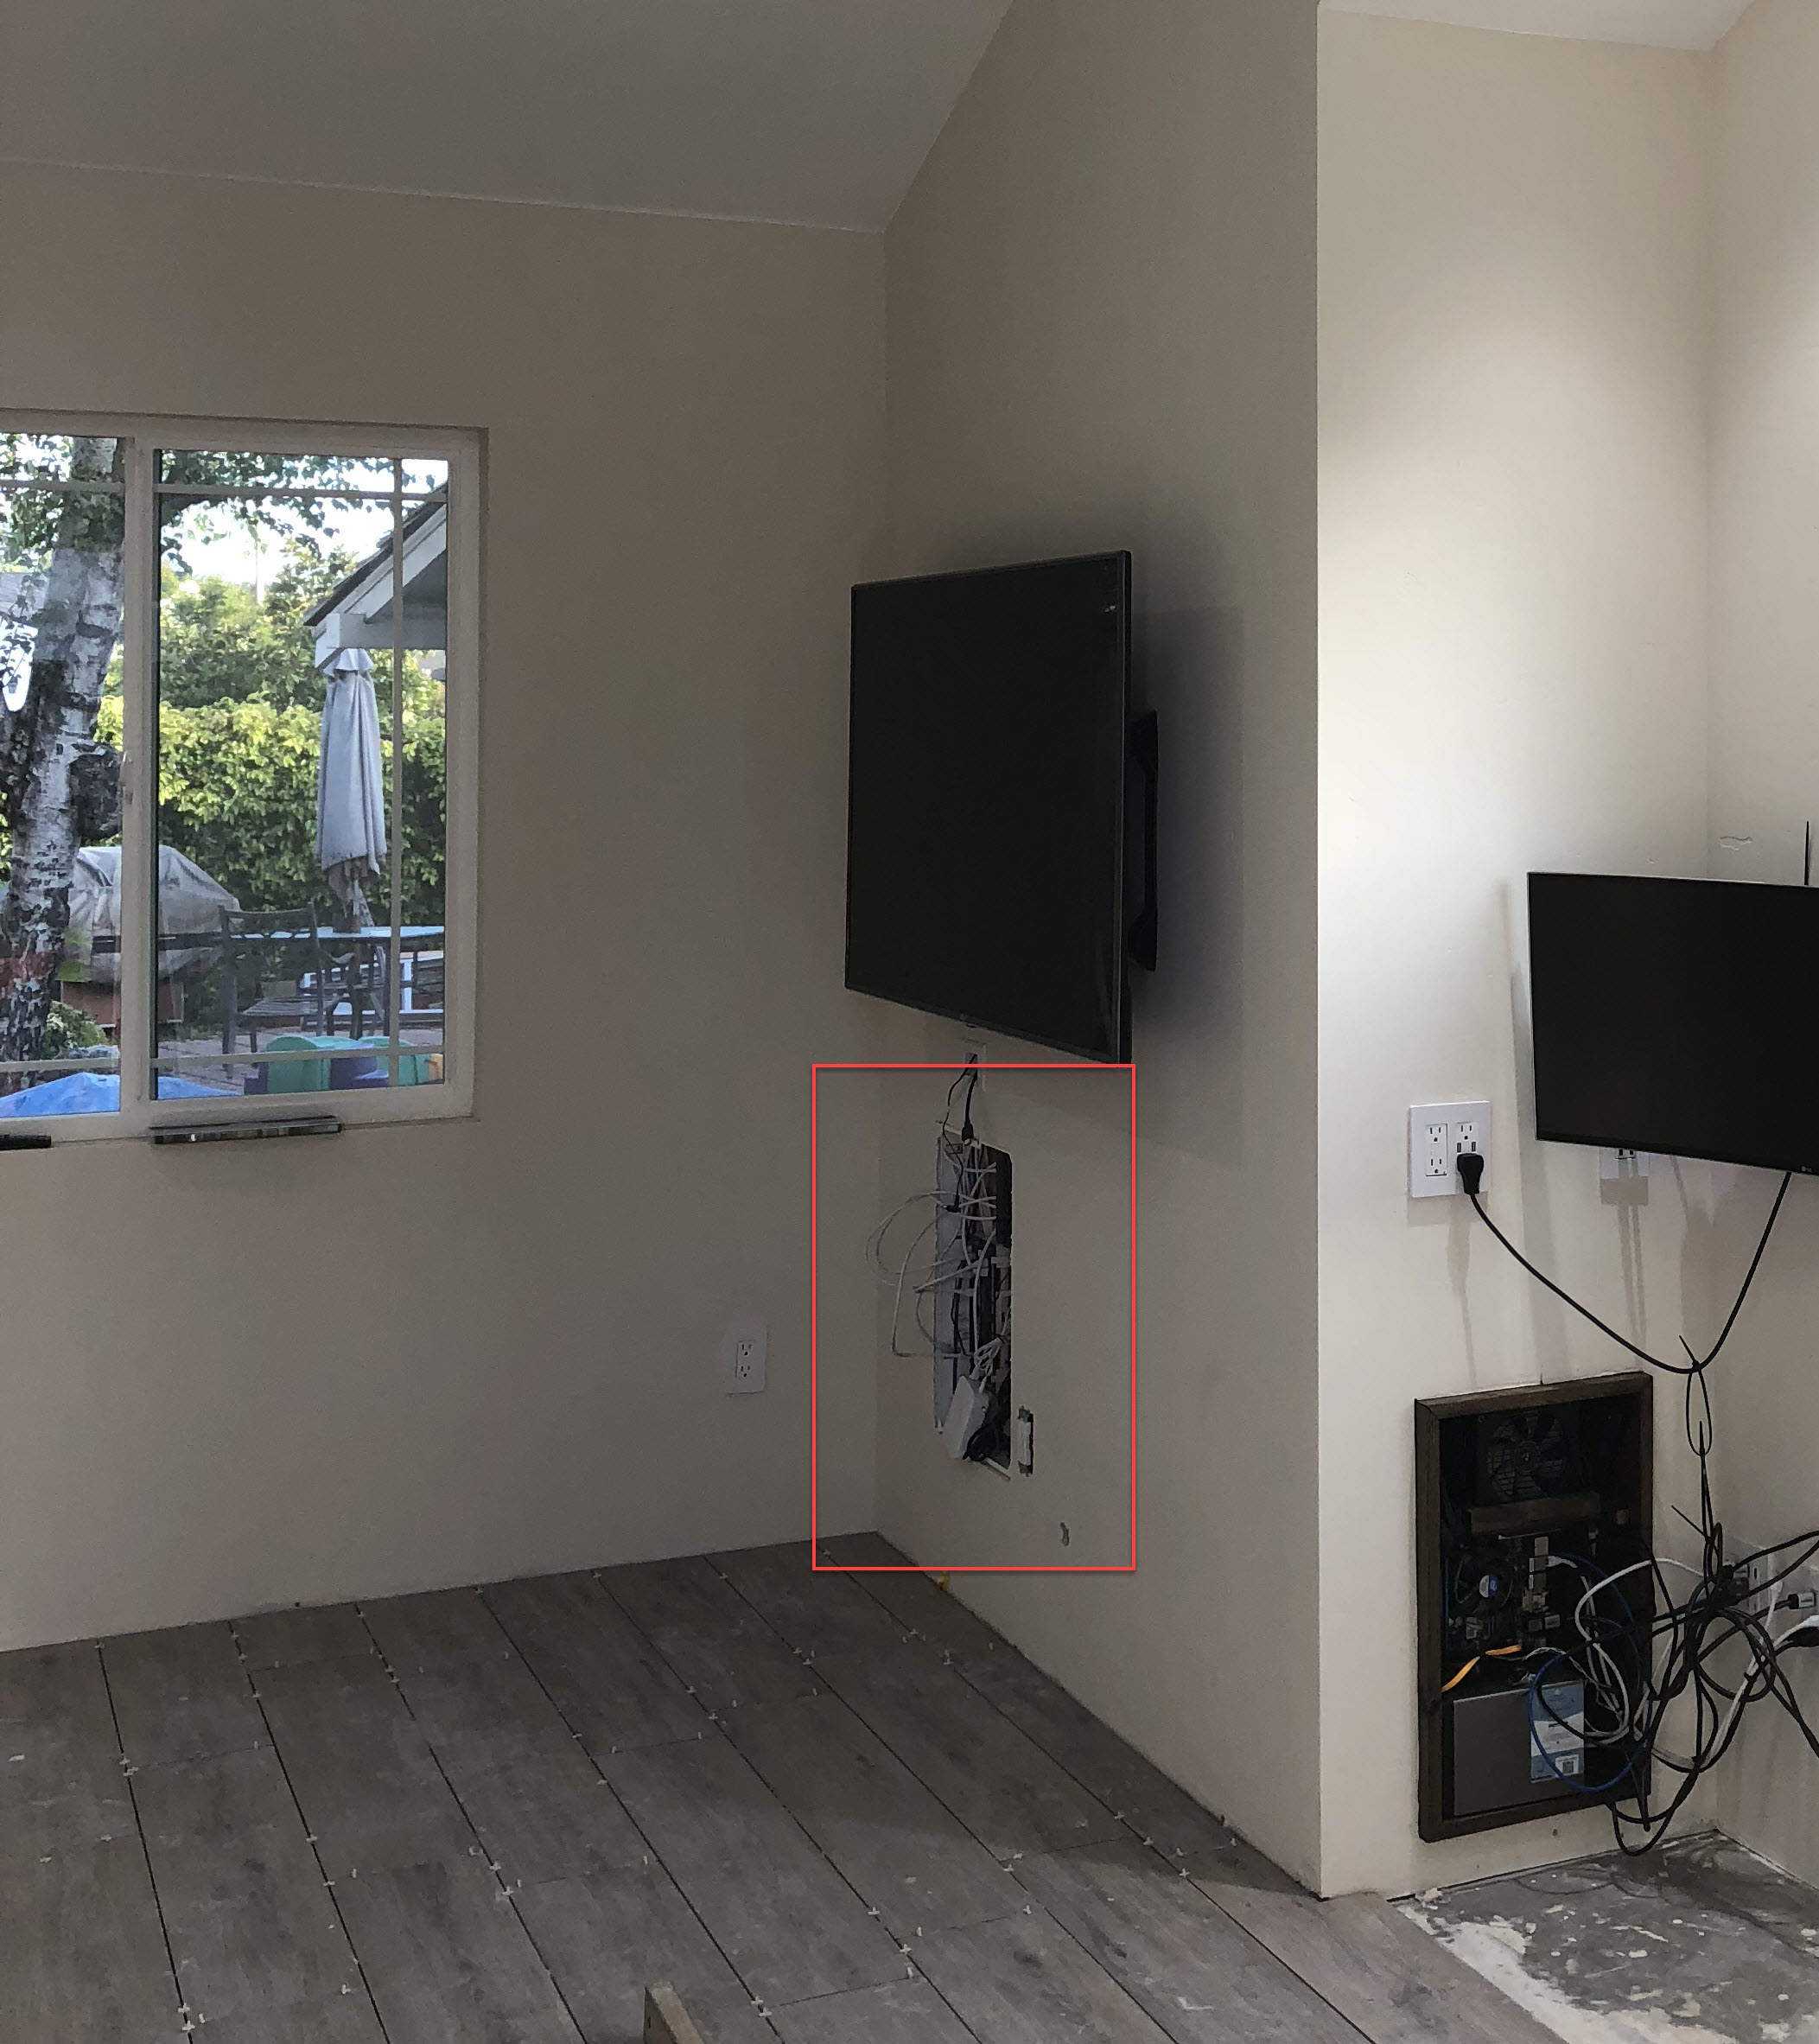
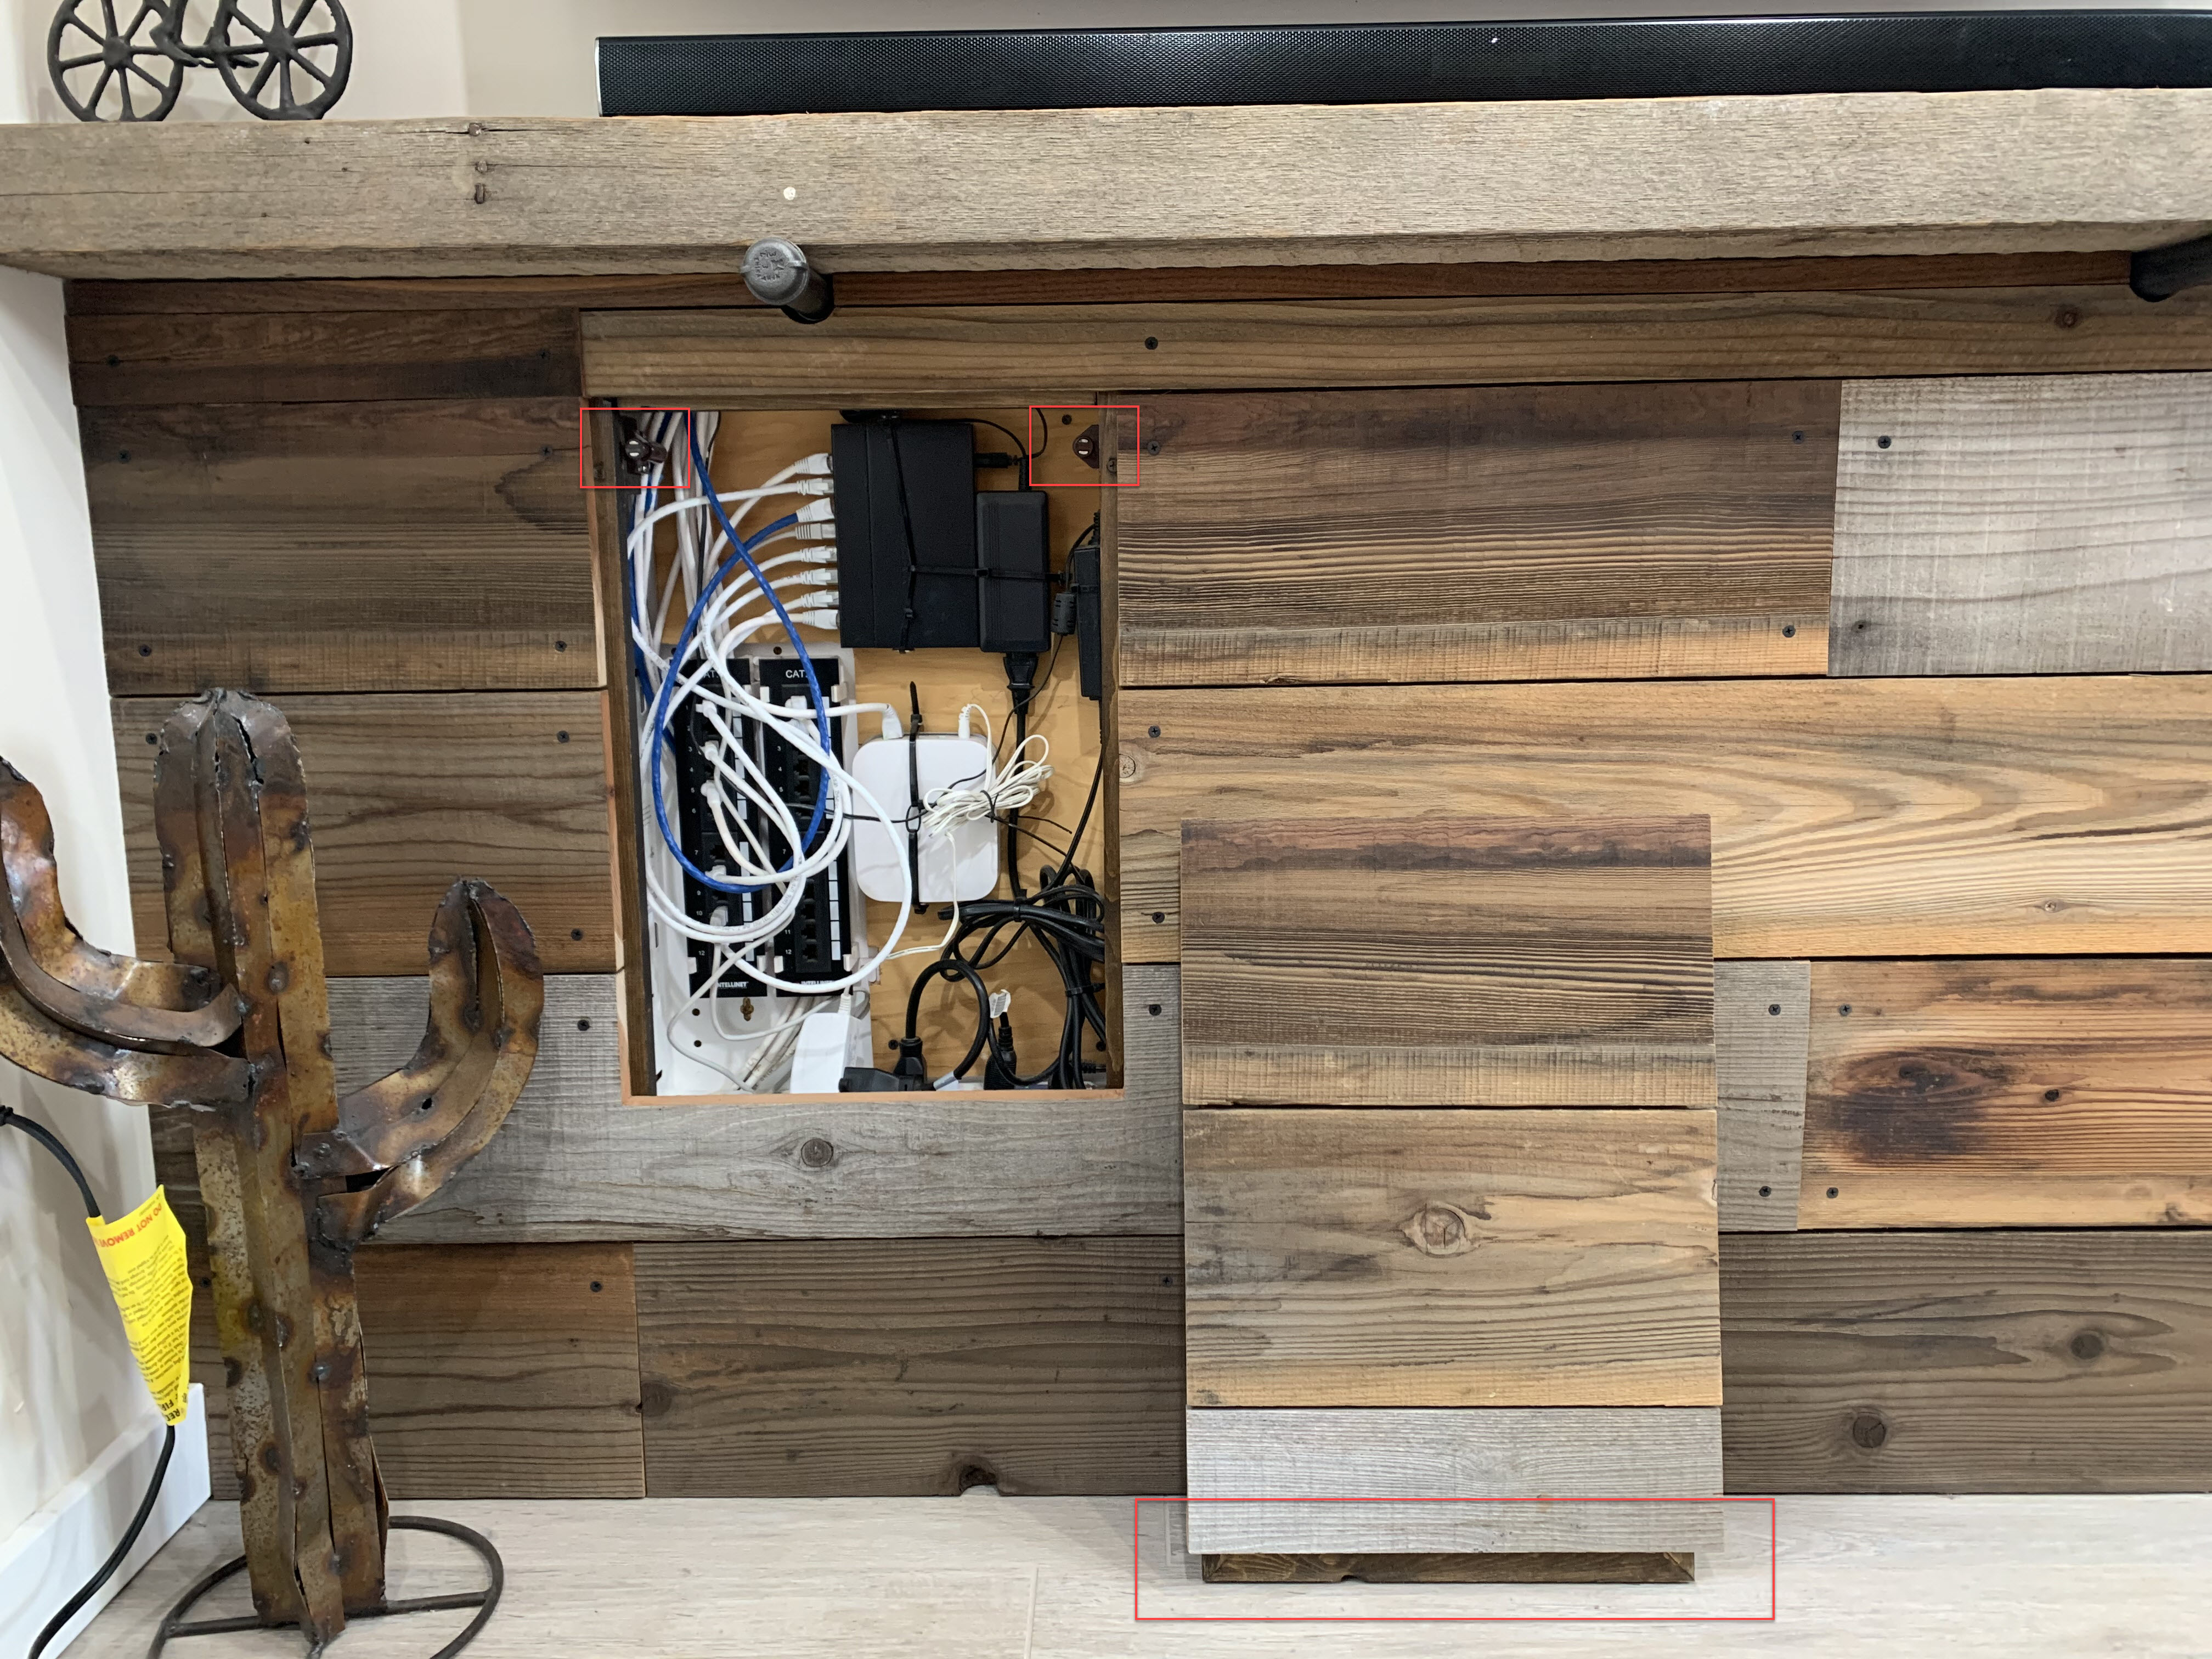
Here’s the before pic. The networking gear is highlighted beneath the TV.
What I used:
- Recycled redwood fence boards (common in California).
- 1x3 Pine furring strips (stained) - used to create a backing to attach the boards to.
- 1x2 Walnut Strips (stained with Tung oil) - used to cover the top and right side exposed edge.
Note: I took pictures sporadically, so the flow is not entirely sequential.
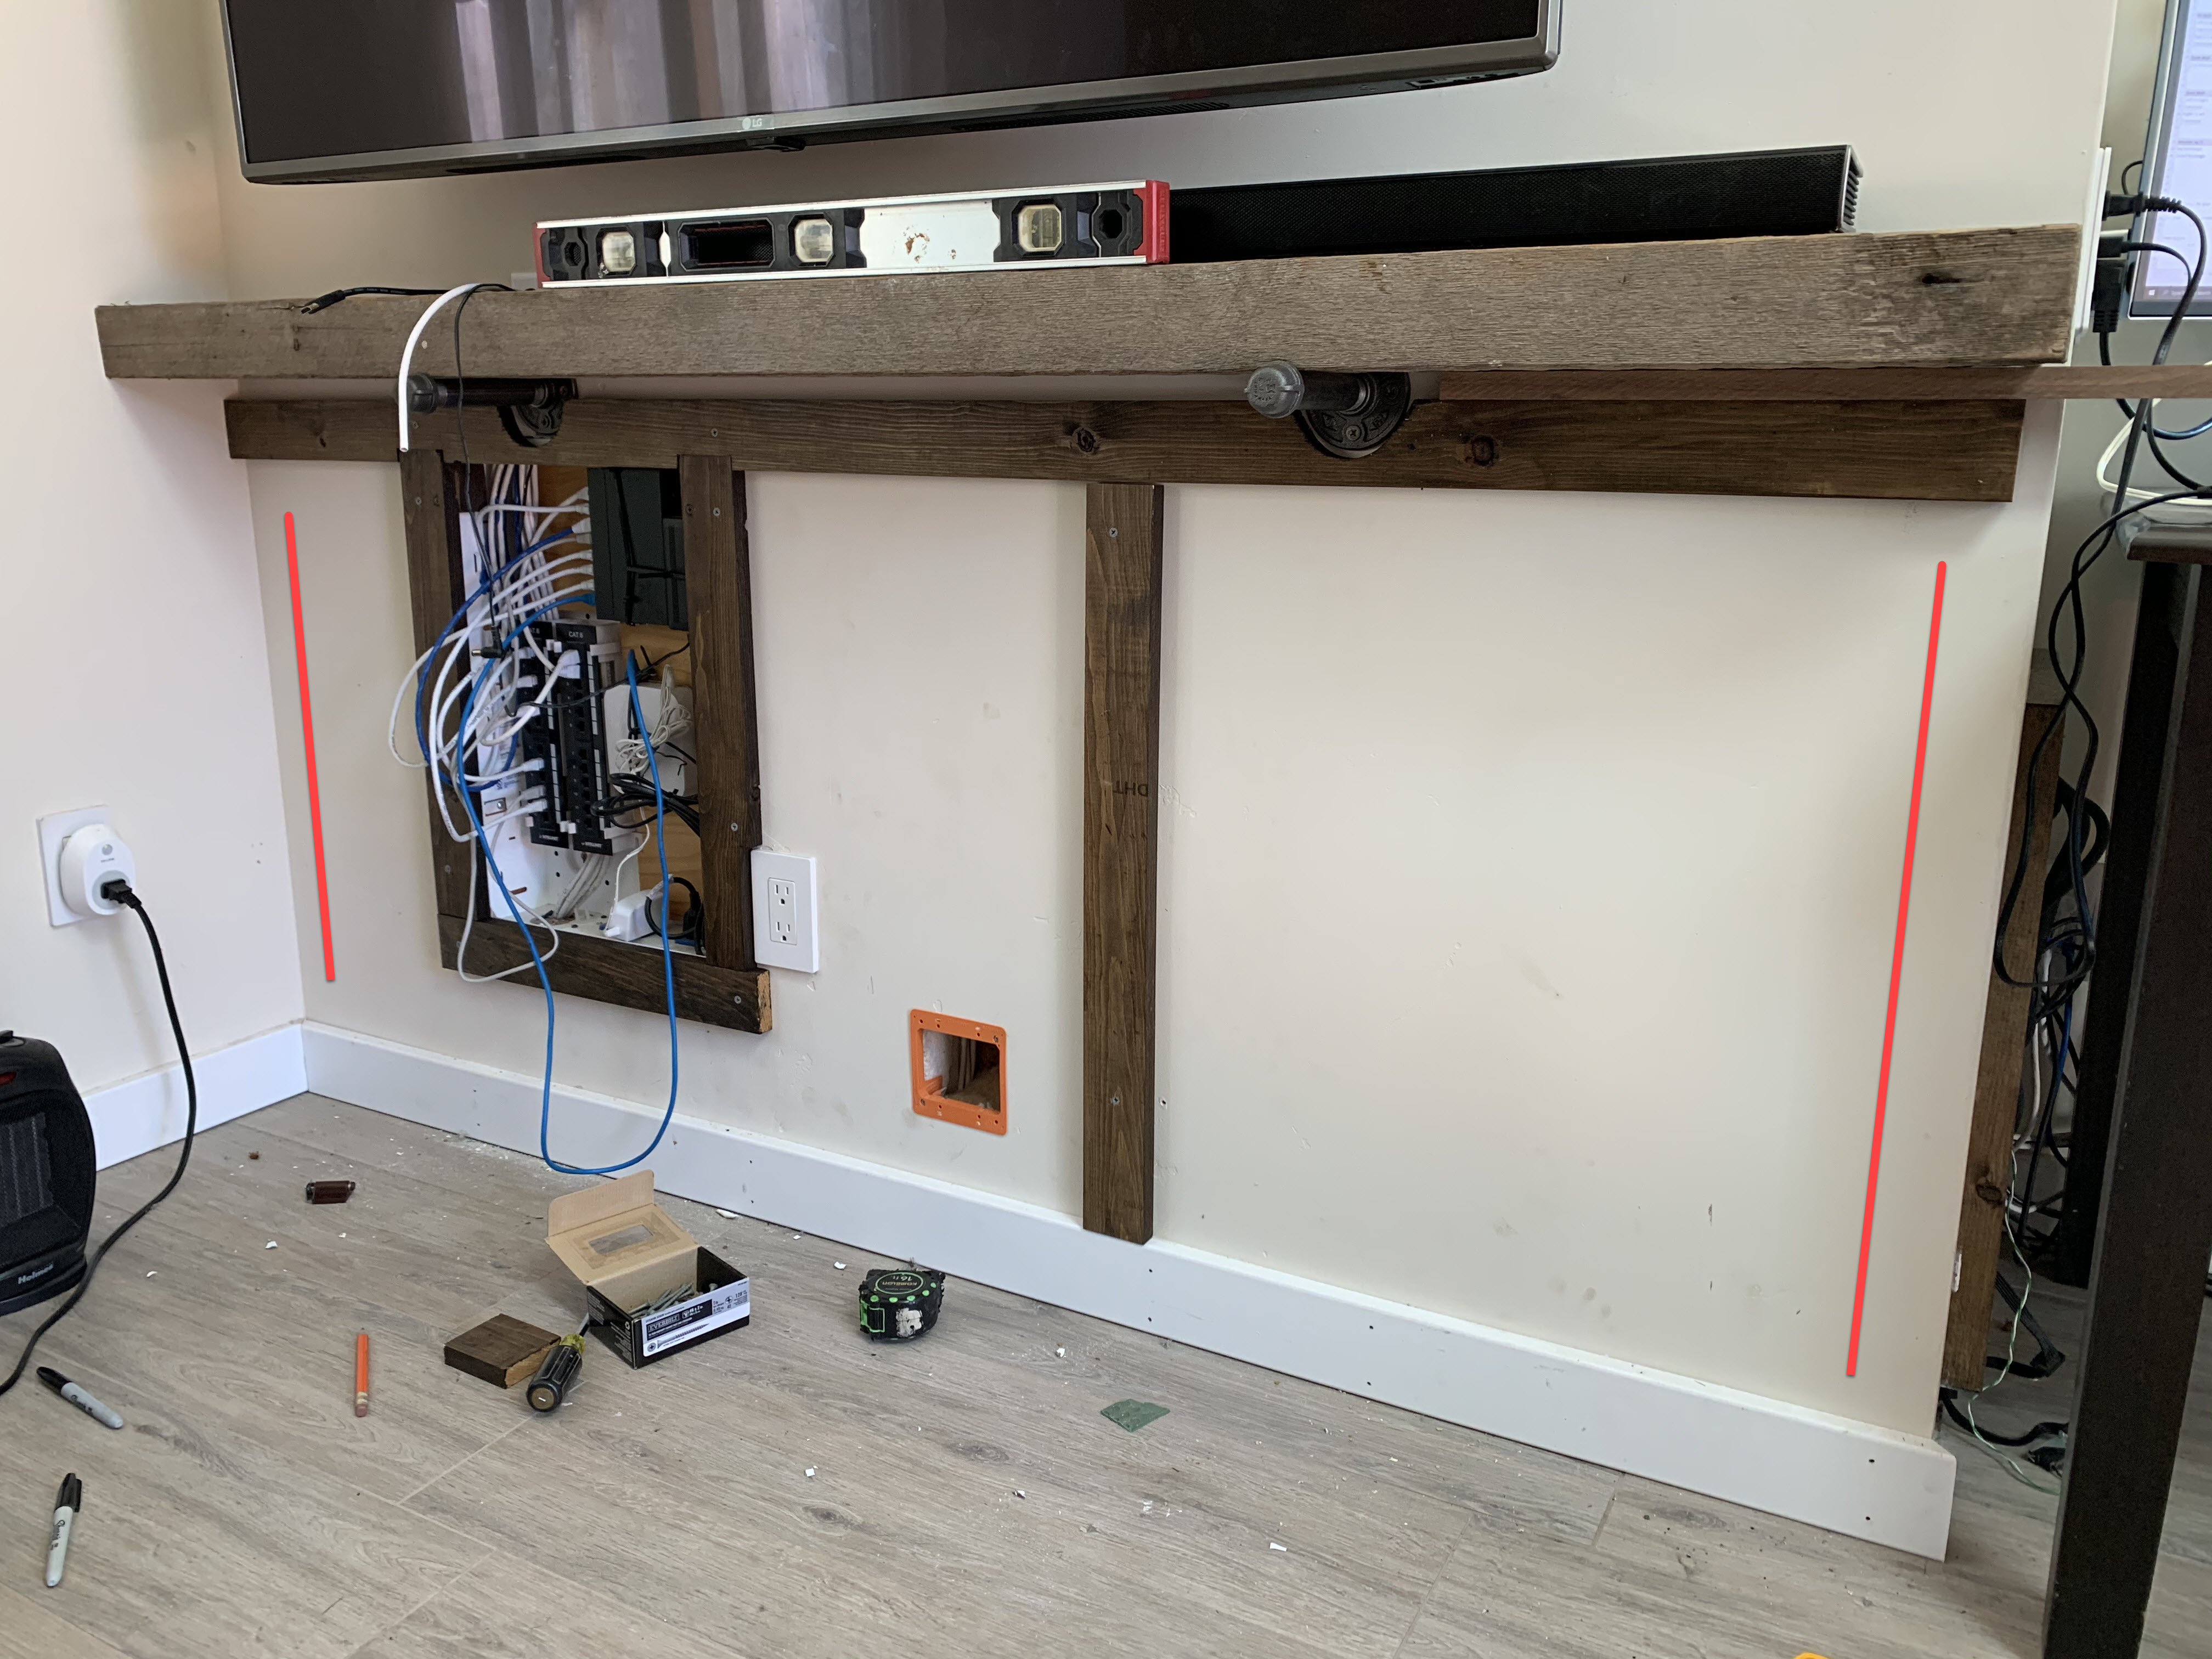
I didn’t take any pictures of the shelf installation, but that was first step to determine the proper distance it should be from the TV. The picture below shows the installation of the pine furring strips. The red line shows the location of two other strips yet to be installed.
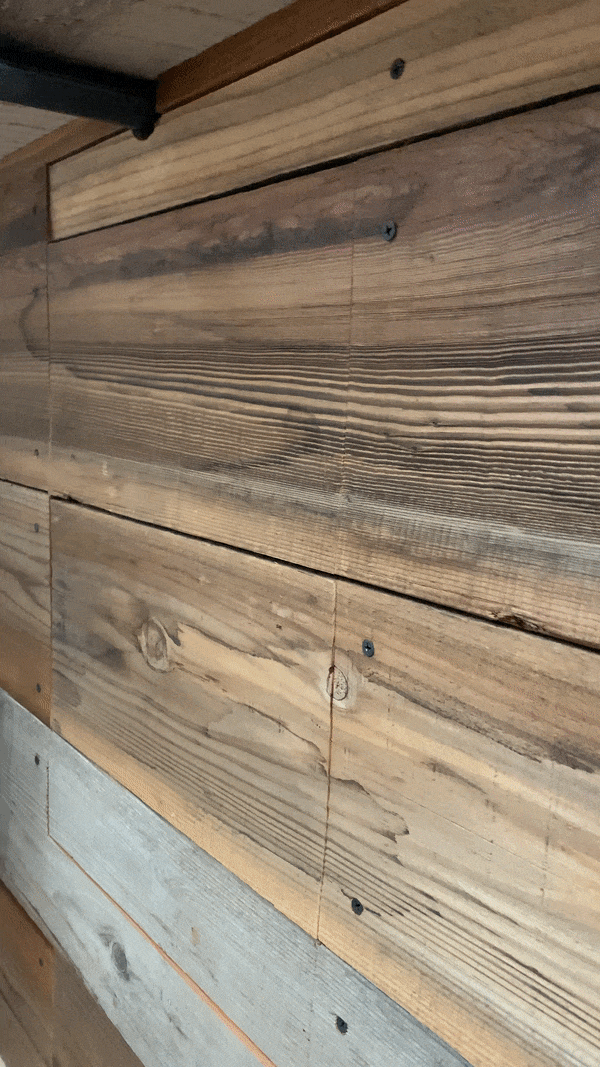
This shows the walnut top and right side edging installed. An edging strip was needed to cover the extra depth created by affixing the furring strips and the fence board to the wall. Coming up with a way to hide the access panel was where I had the most fun with this project. I wanted the panel to blend in with the rest of boards, be easy to open, and not use any hinges. That led me down the path of using push magnets!
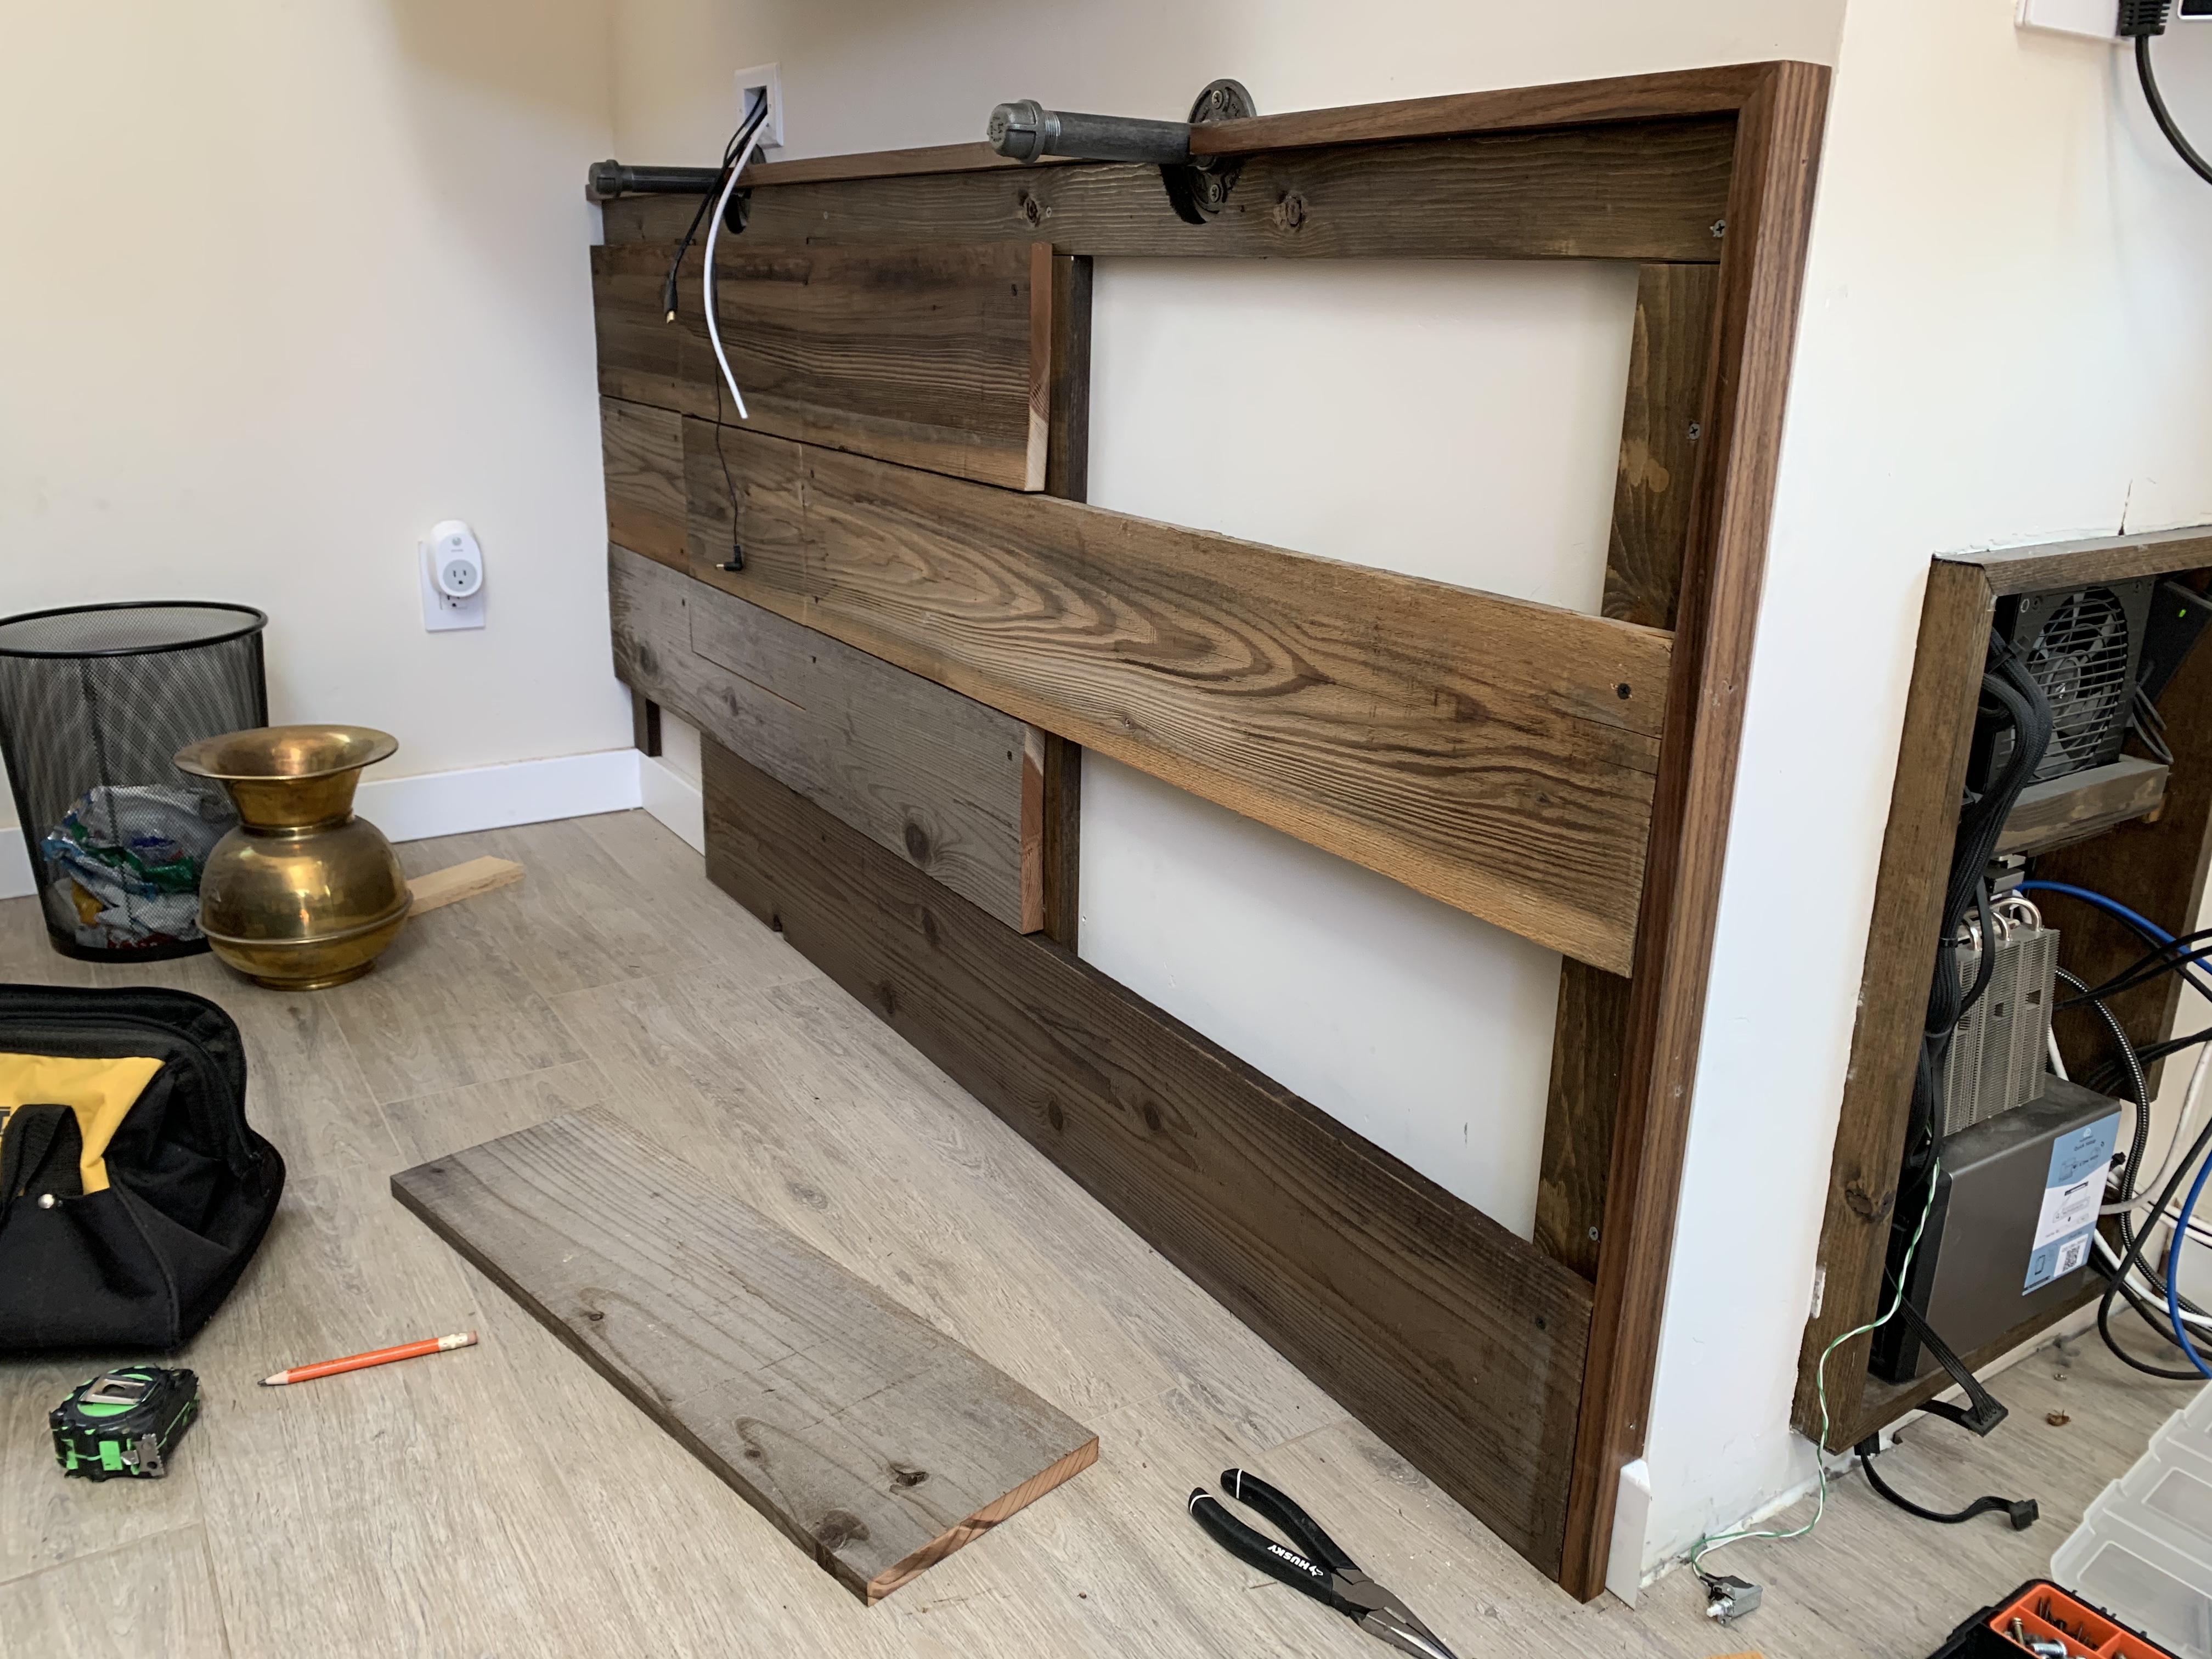
I started by creating a wooden frame to fit inside the furring placed around the perimeter of the enclosure (see two pictures back).
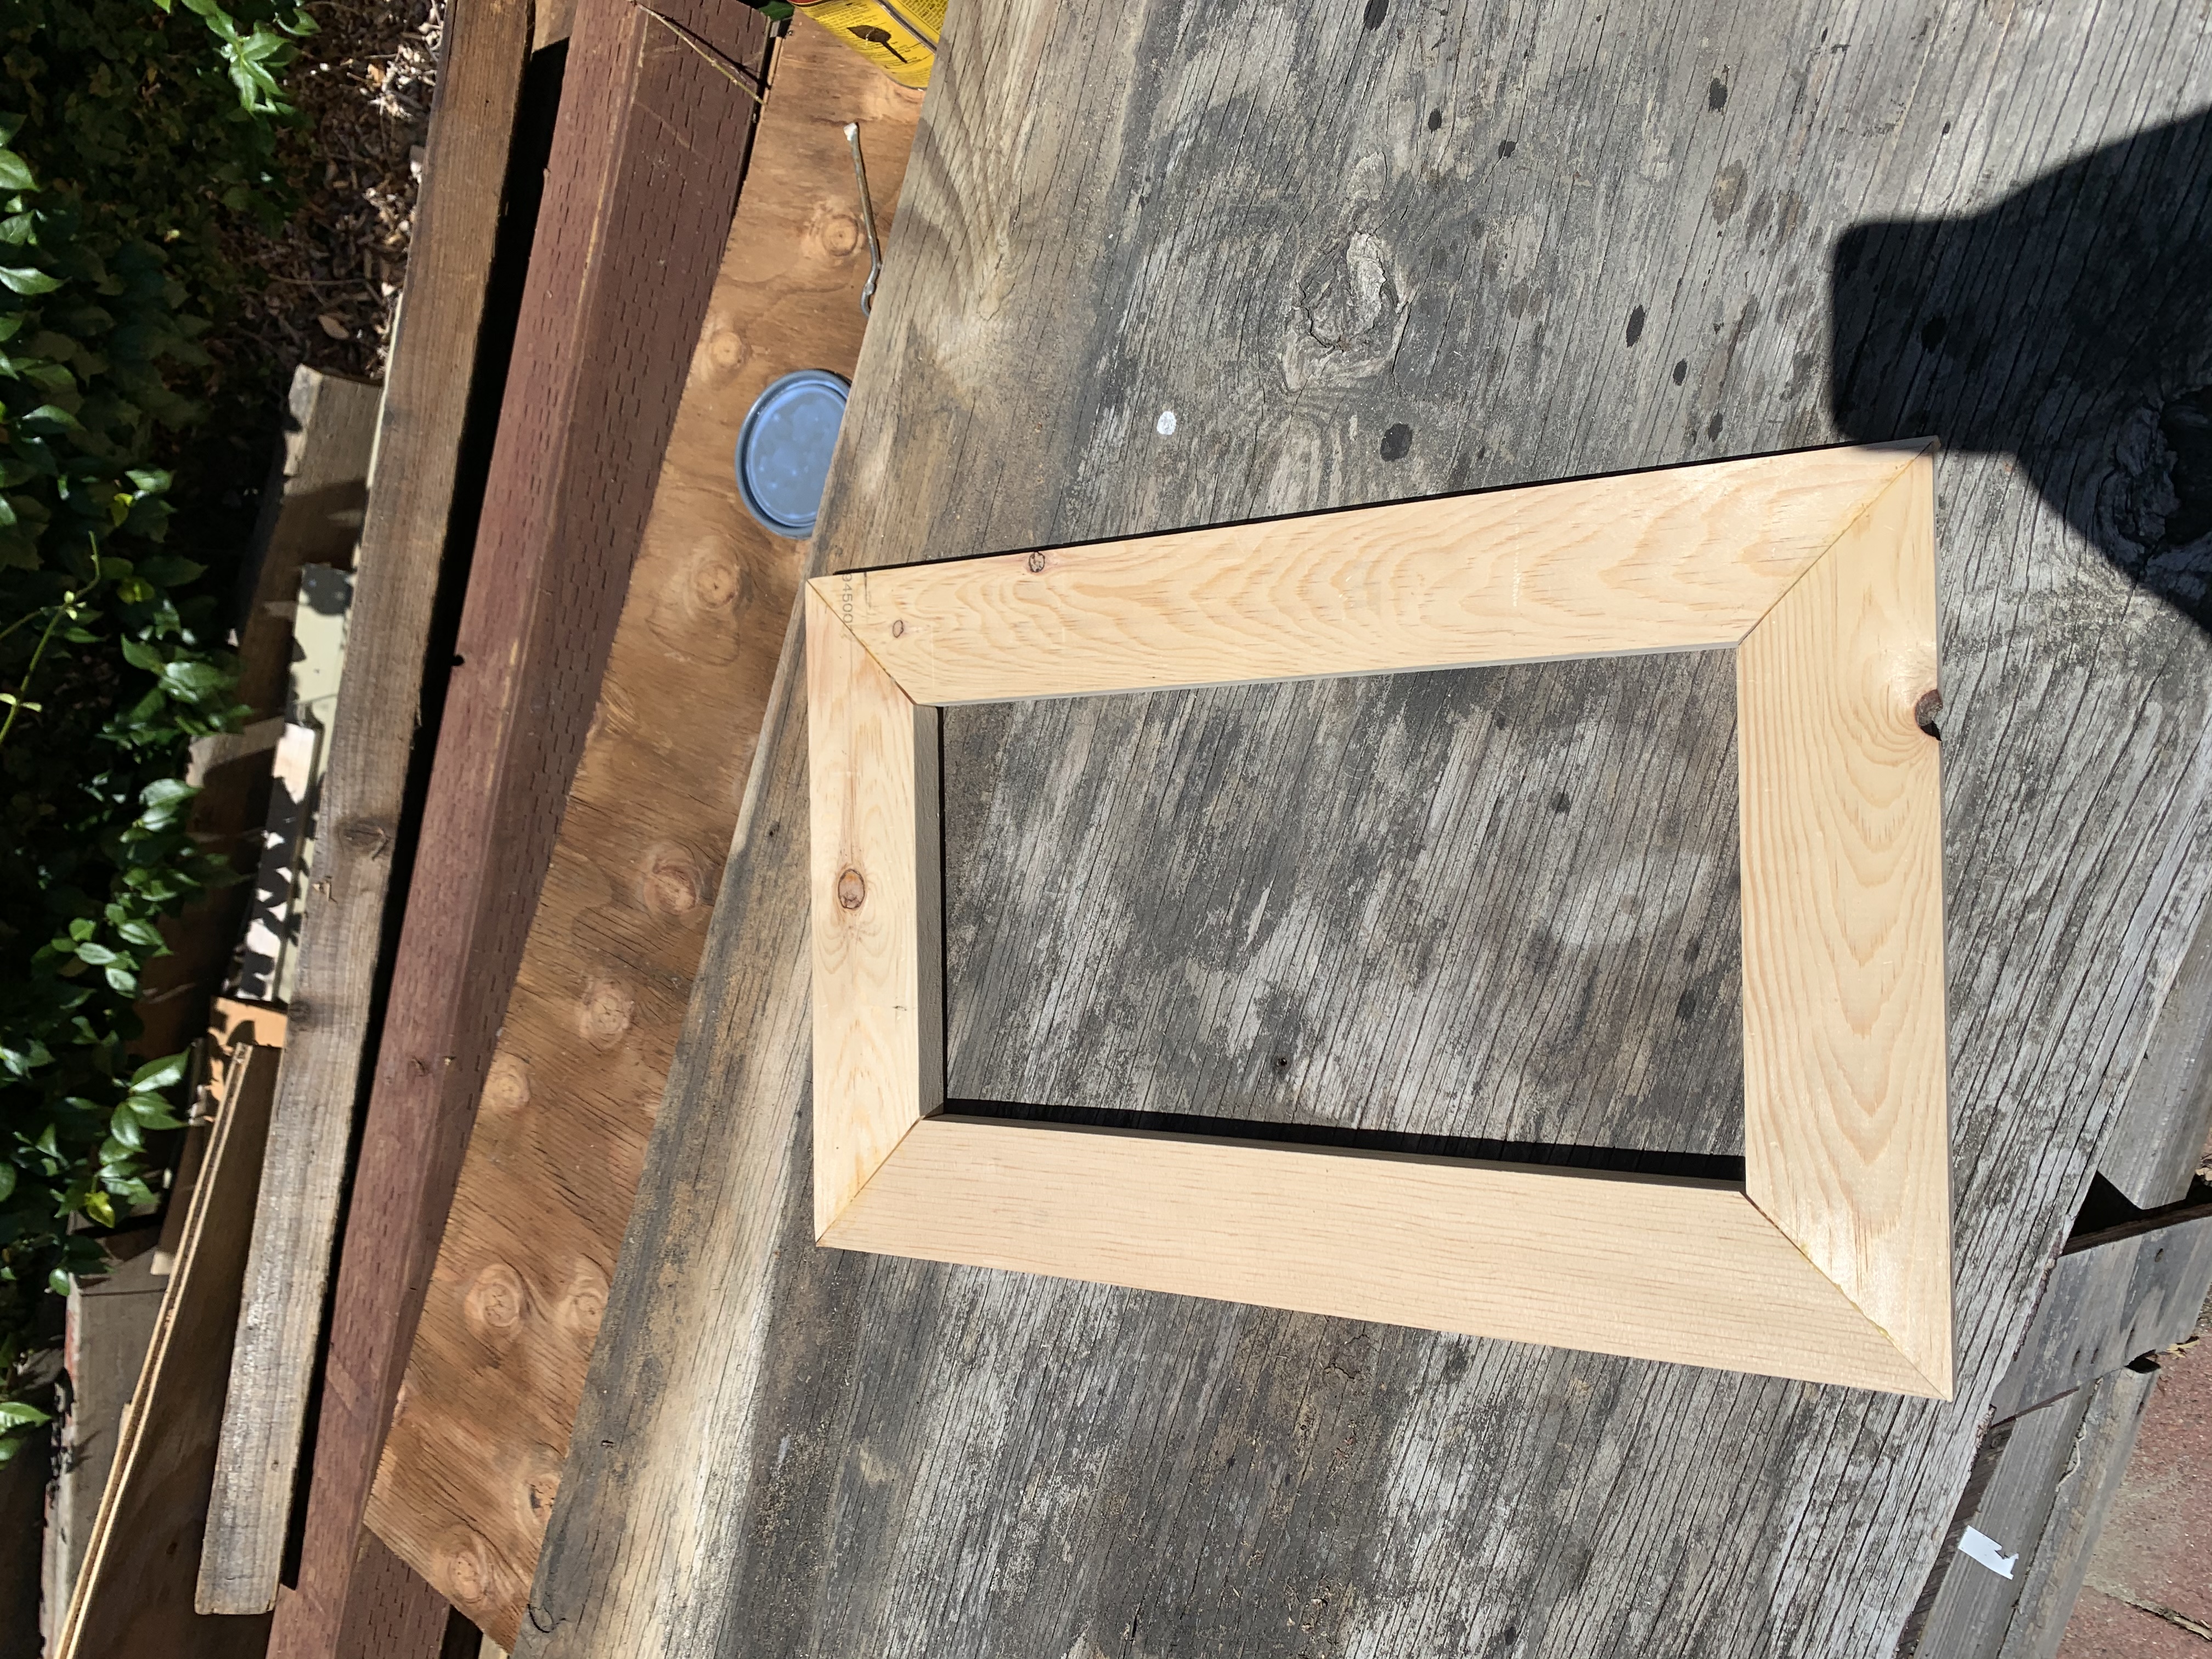
The metal plates attached to the backside of the frame are attracted to the push magnets installed to the inside top of the enclosure. To create internal clearance for the door to be pushed in/out, I rabbeted the edges of the two top planks and attached them to the door to align with the planks already affixed to the wall.
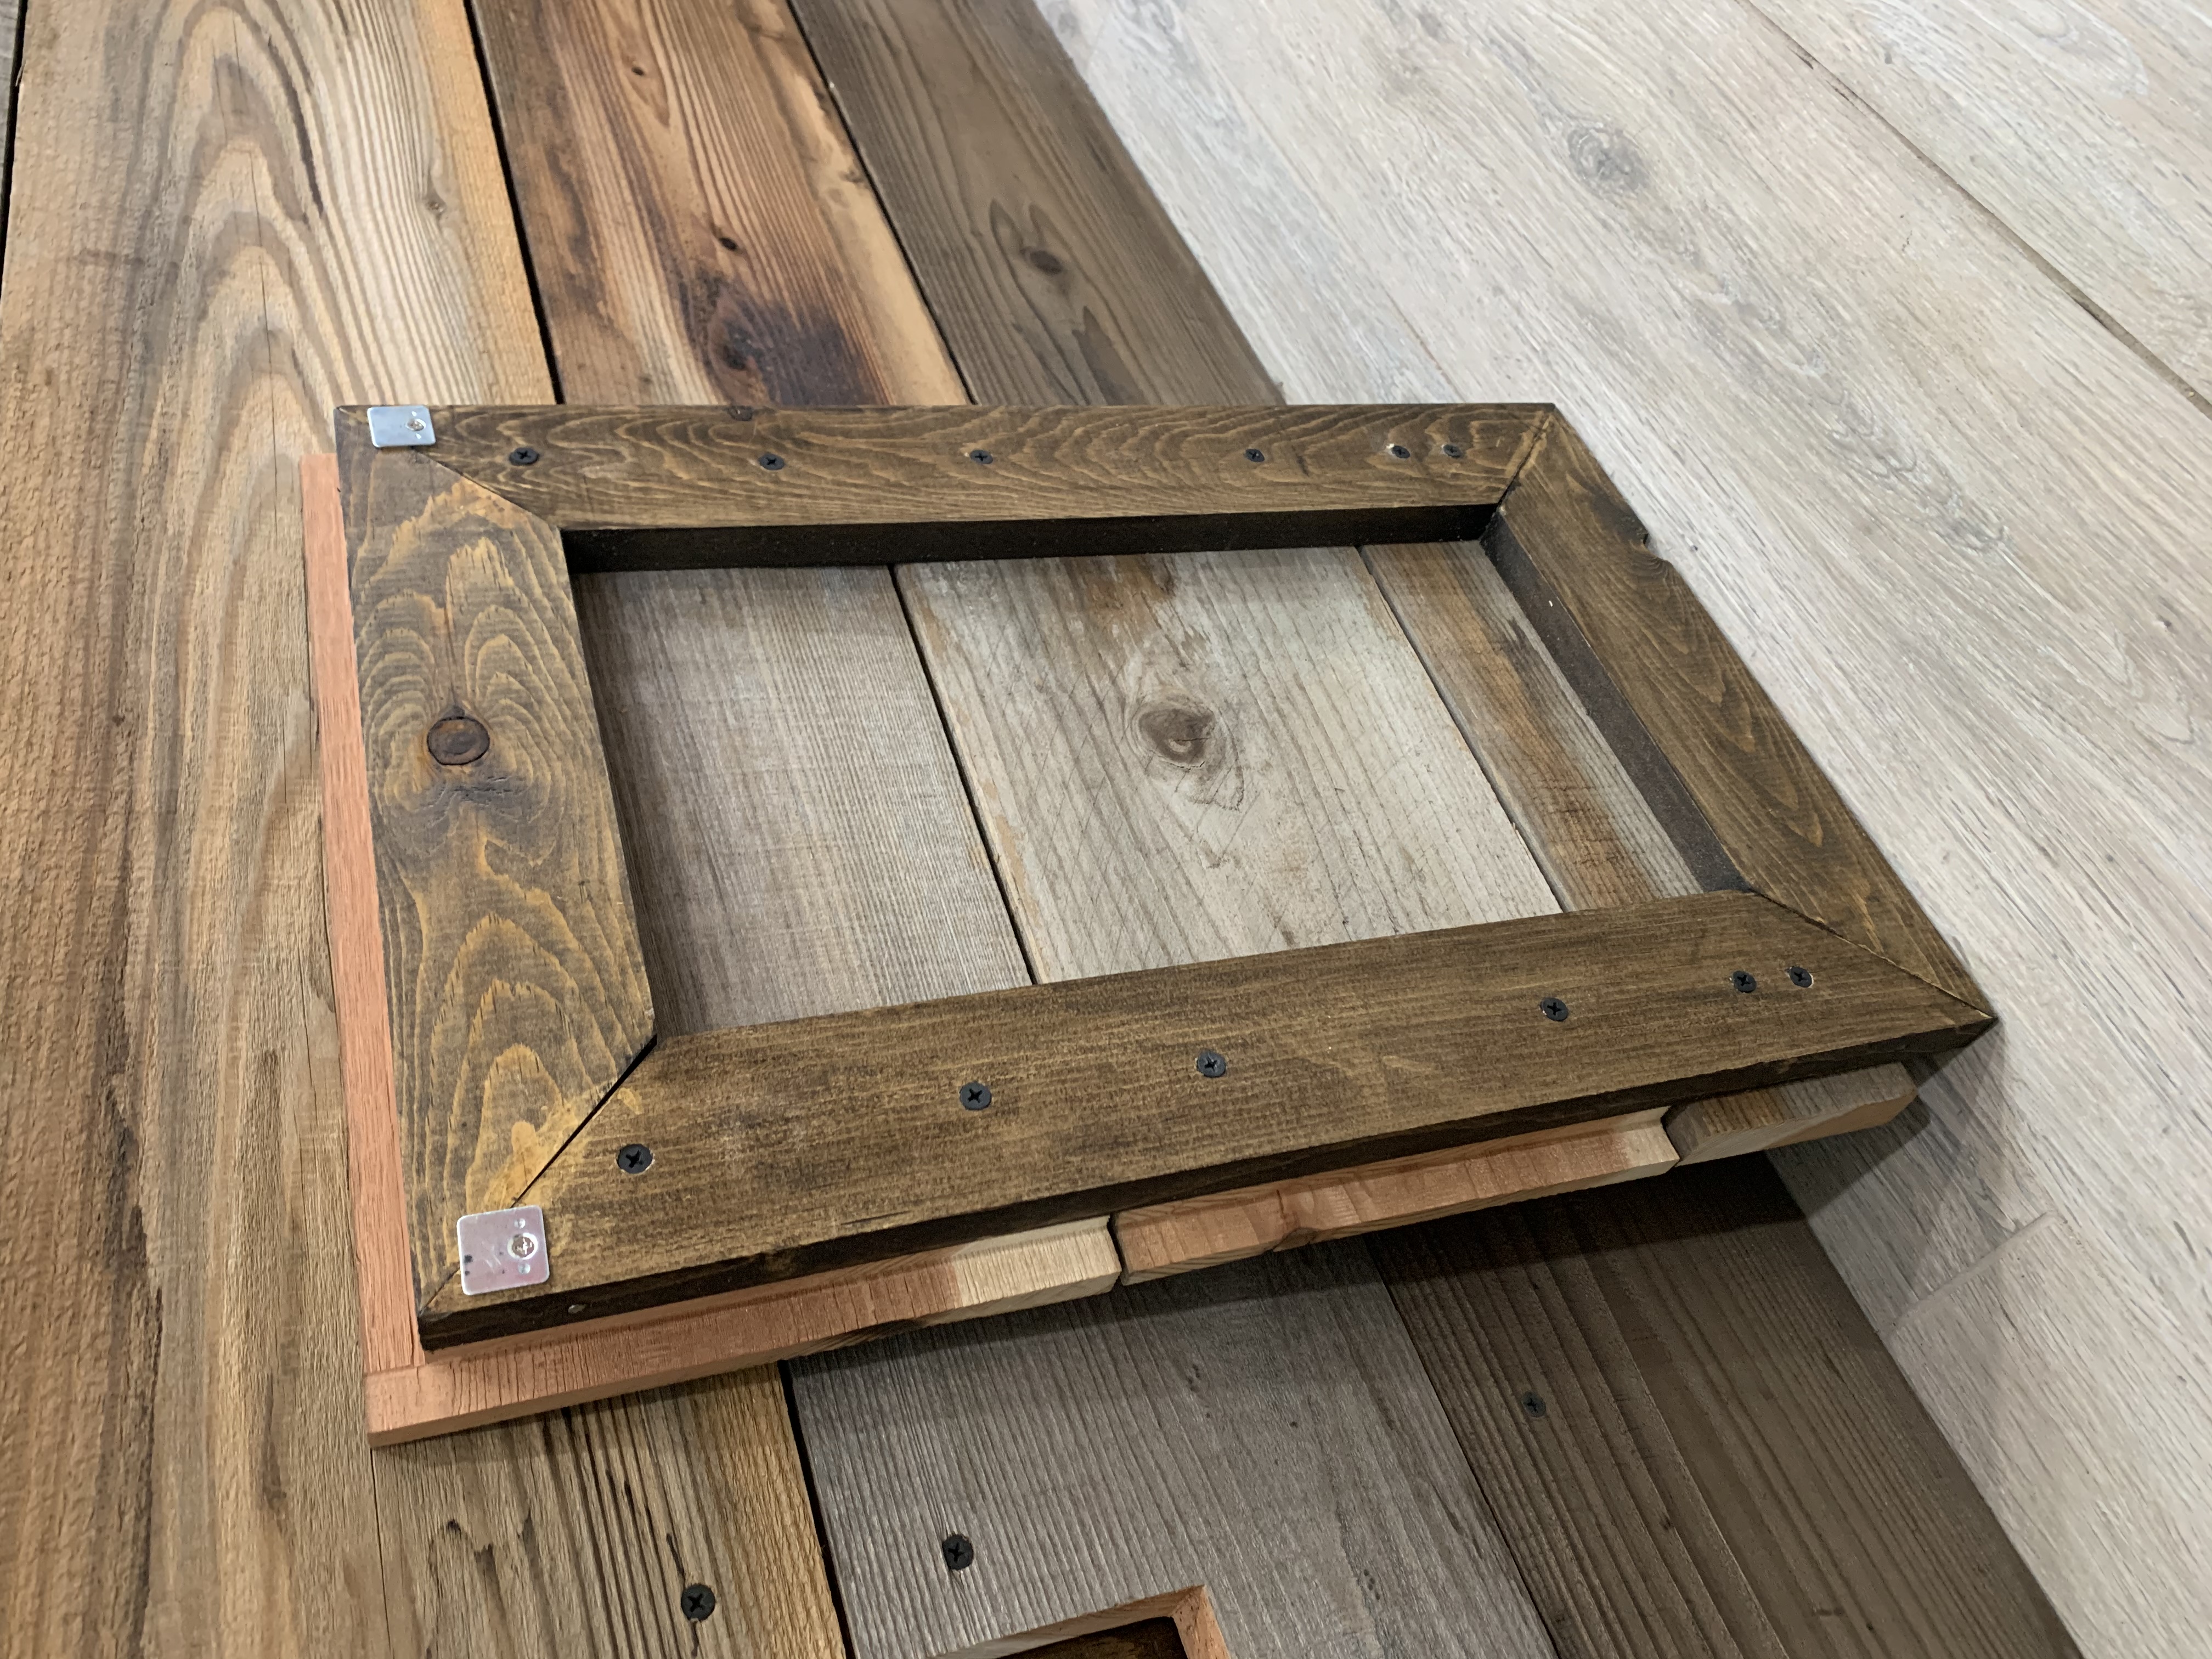
The push magnets are visible inside the enclosure (top) in this picture. The bottom portion of the door frame was left exposed to hook behind the wall plank when the door is put in place.
Here it is in action.
Project complete
